Re-Installing Windows 11 Technical Guide

Re-Installing Windows 11 Technical Guide

Reinstalling Windows 11 Made Easy

A Step-by-Step Guide Using a Bootable USB Drive

Whether you're troubleshooting persistent issues, upgrading from an older version, or just want a fresh start, reinstalling Windows 11 can breathe new life into your PC.

In this guide, we’ll walk you through:

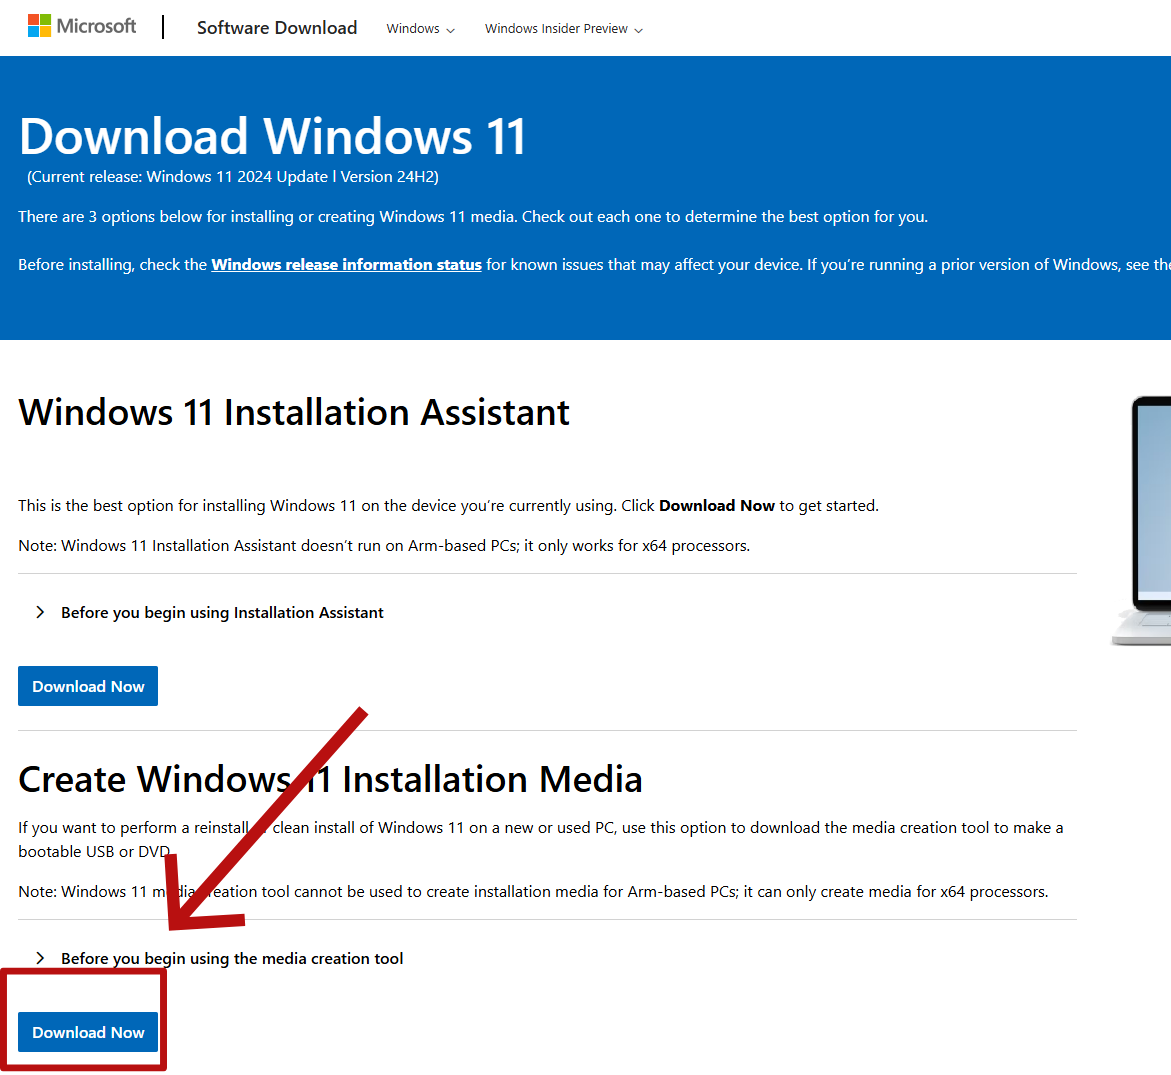
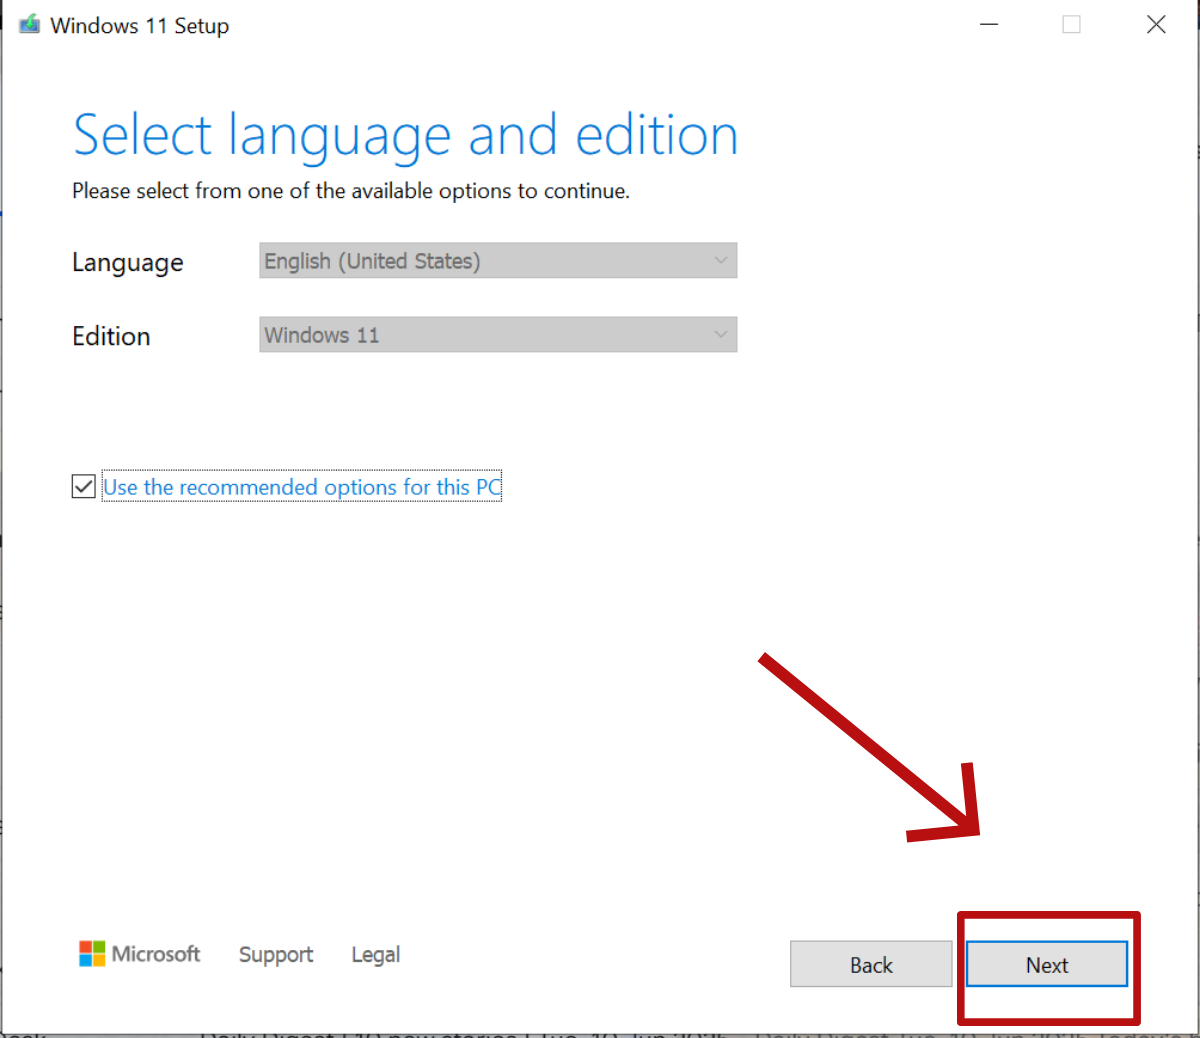
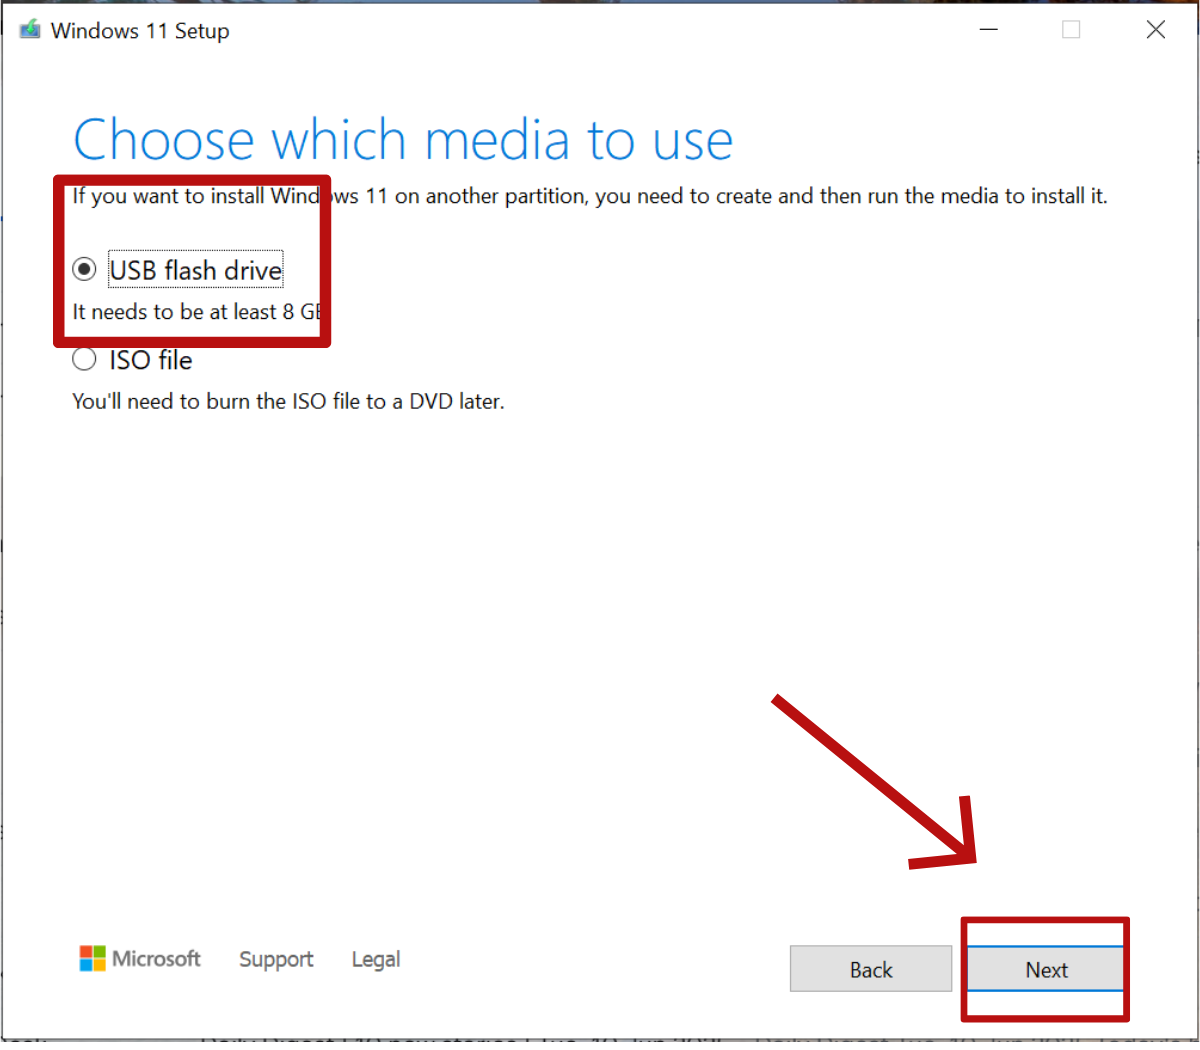
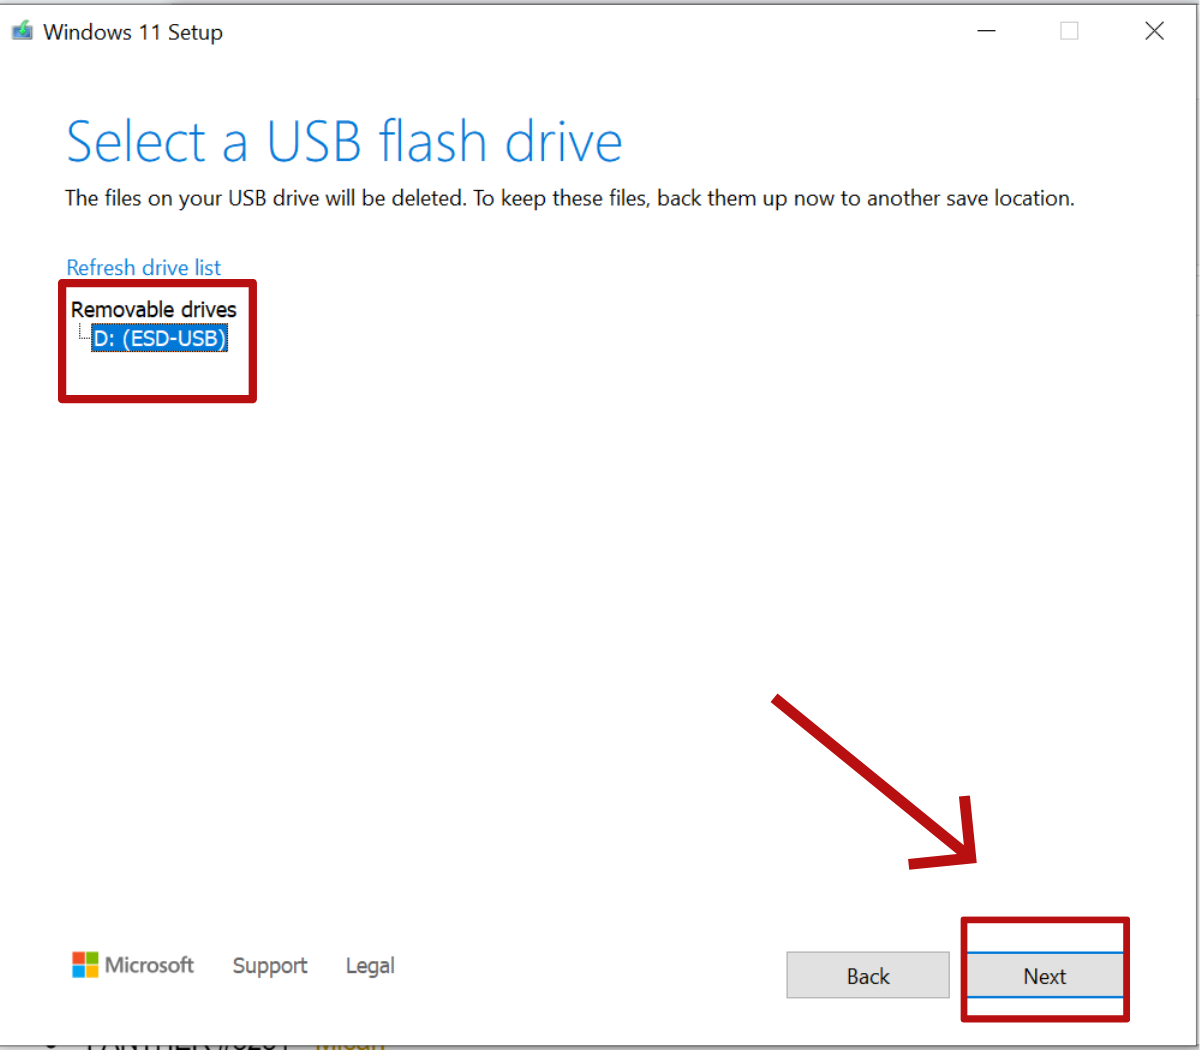
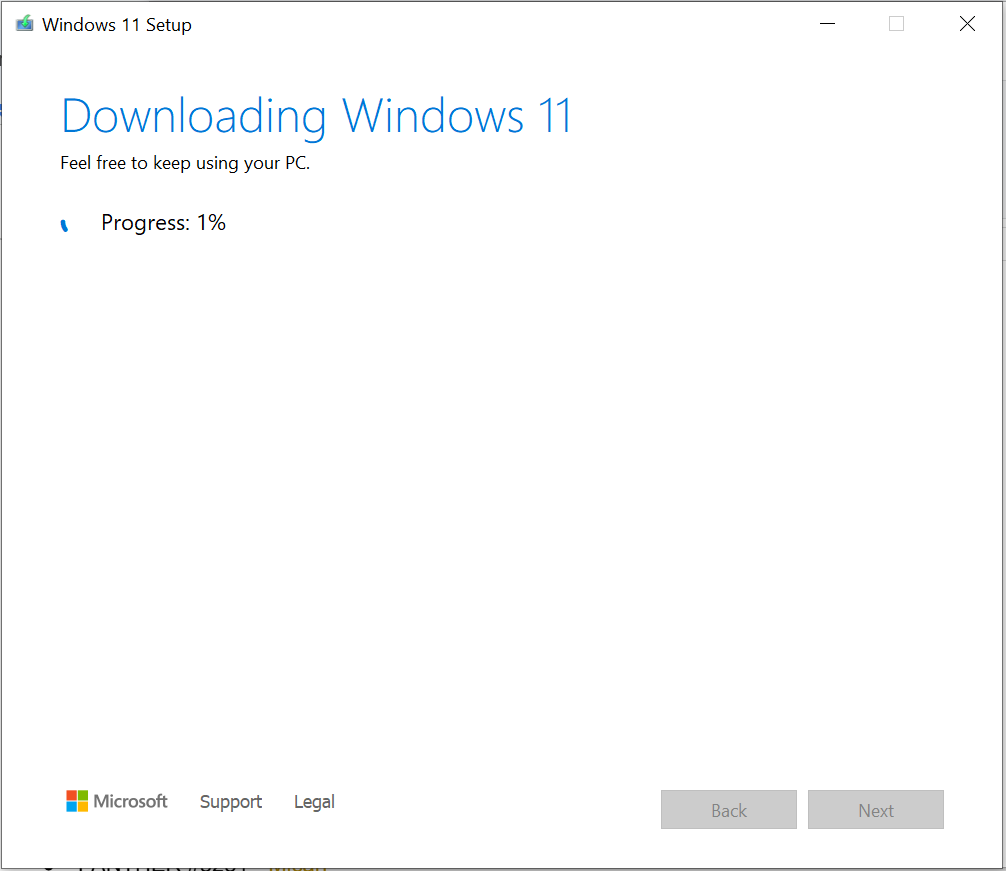
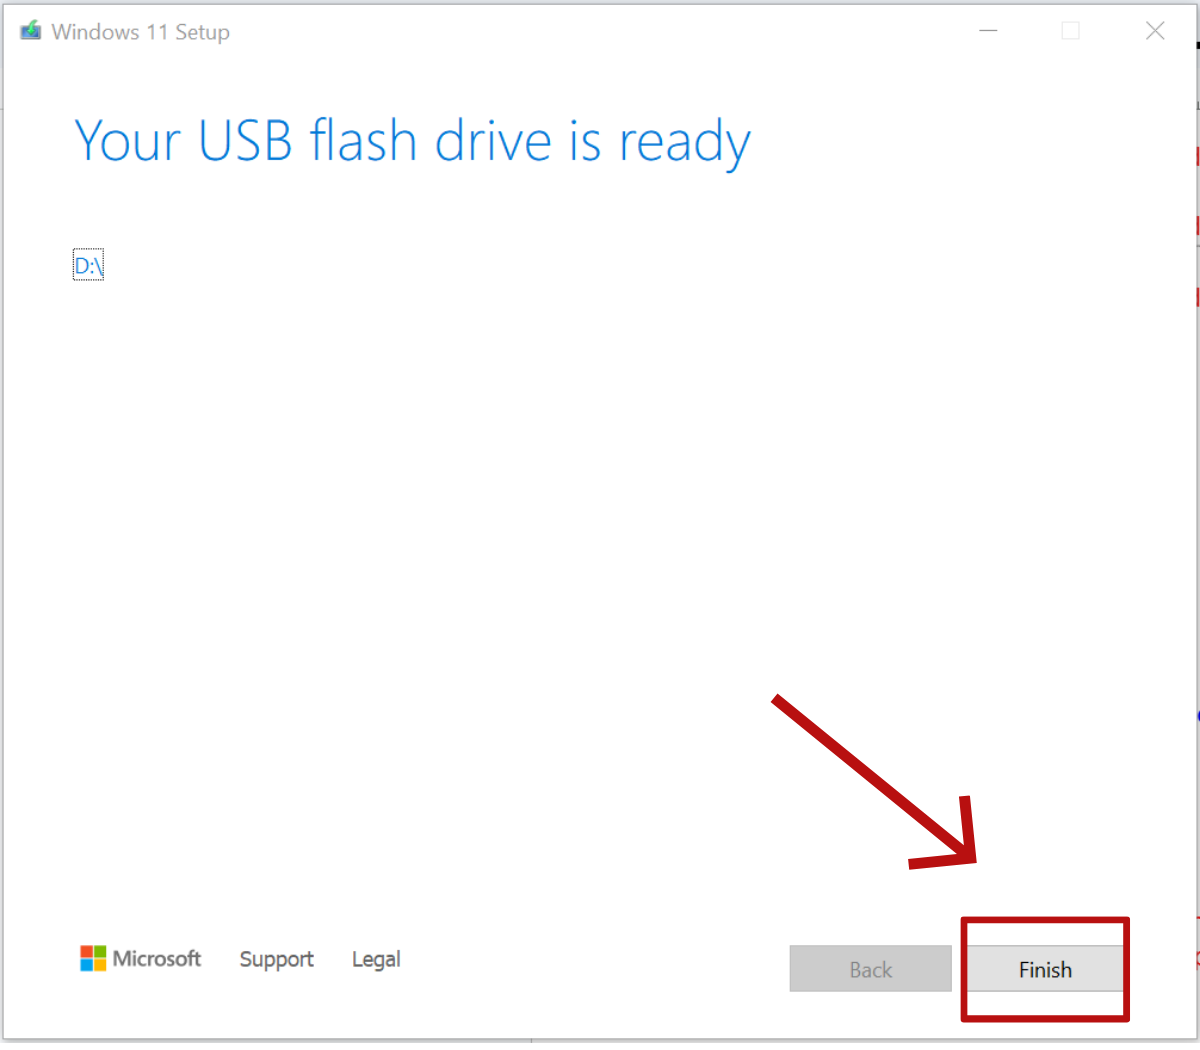
  • Creating a bootable Windows 11 USB installer using Microsoft’s official tools
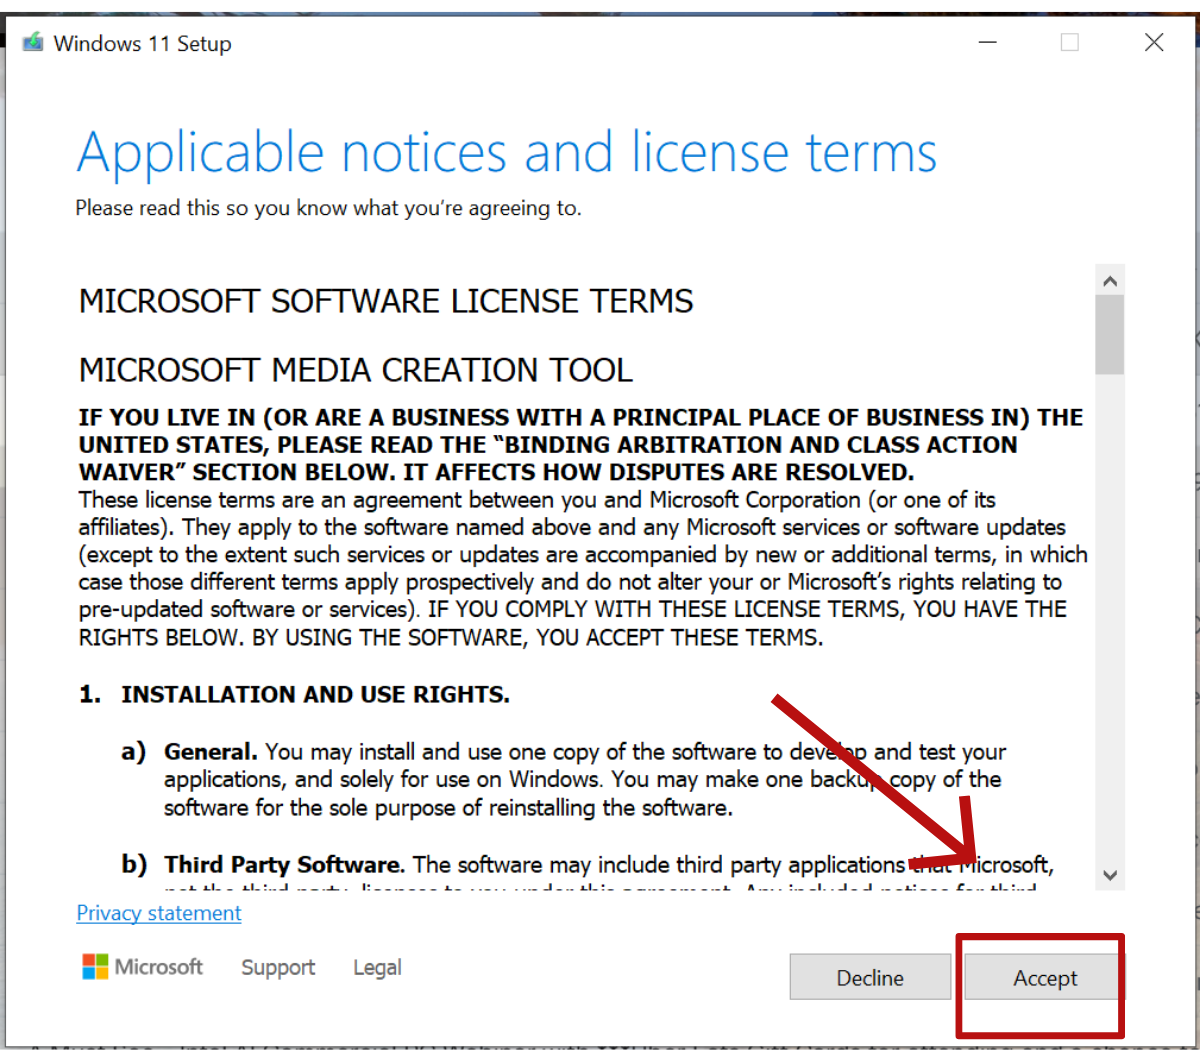
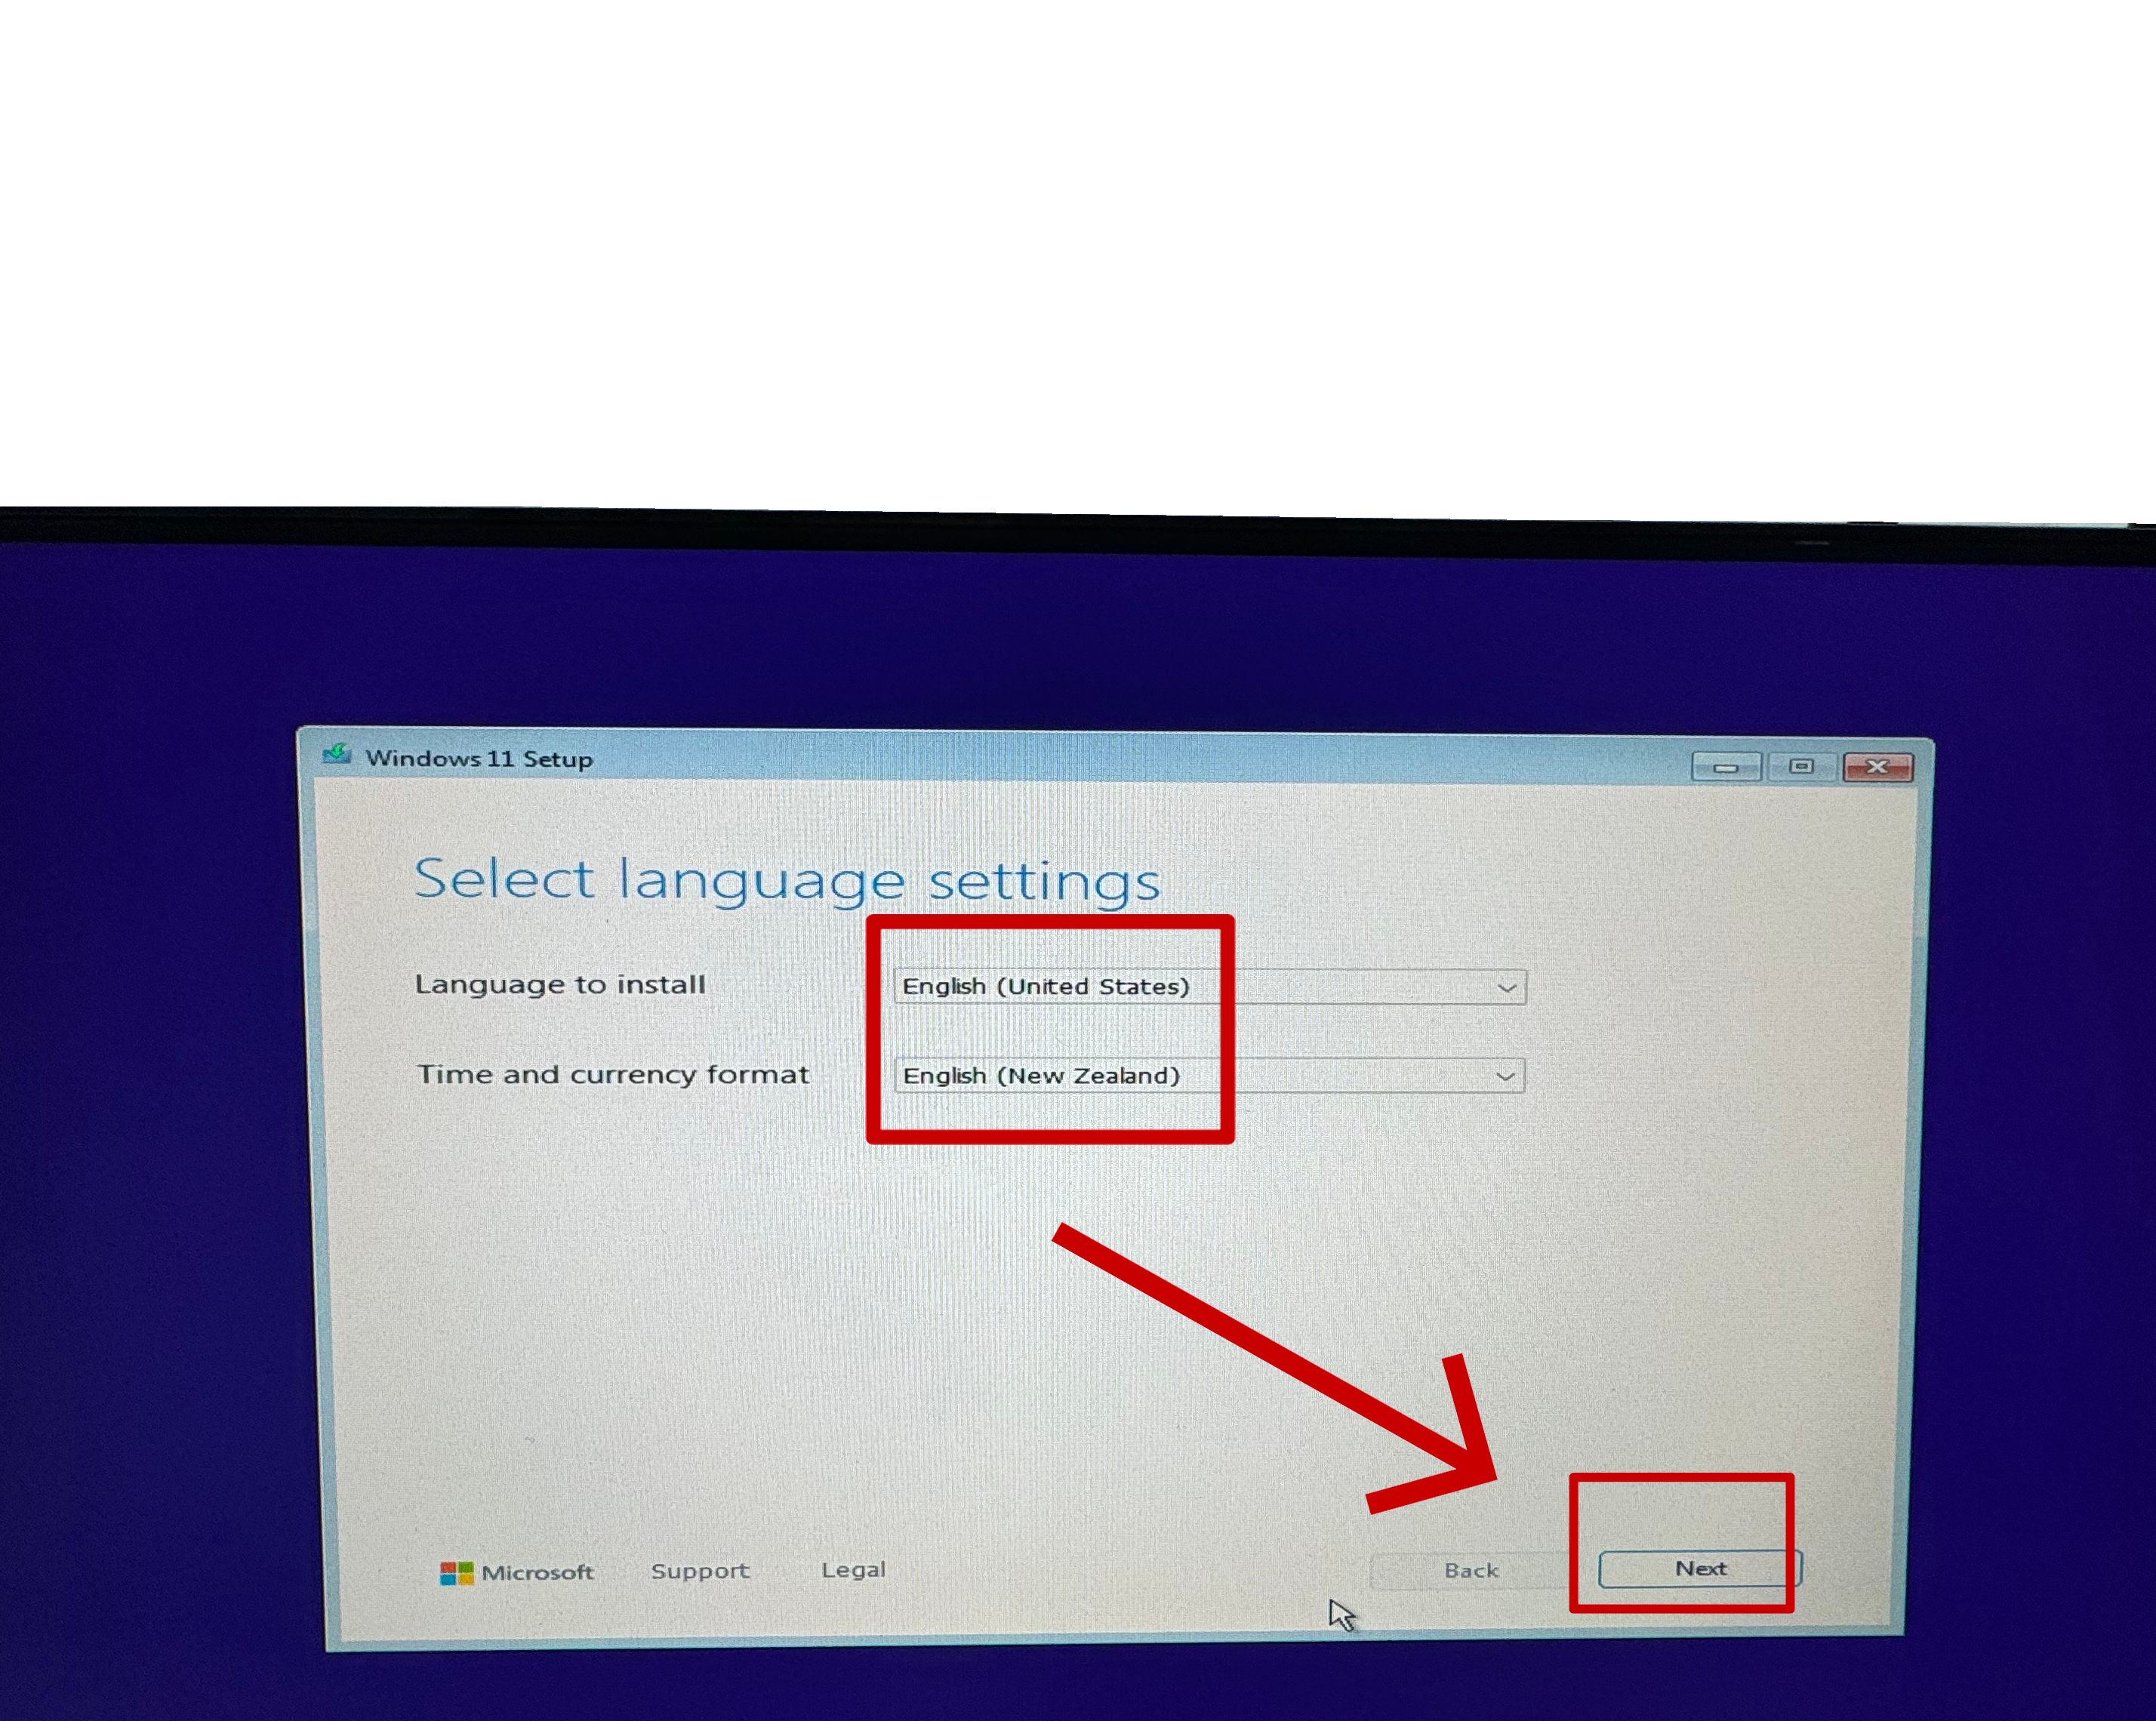
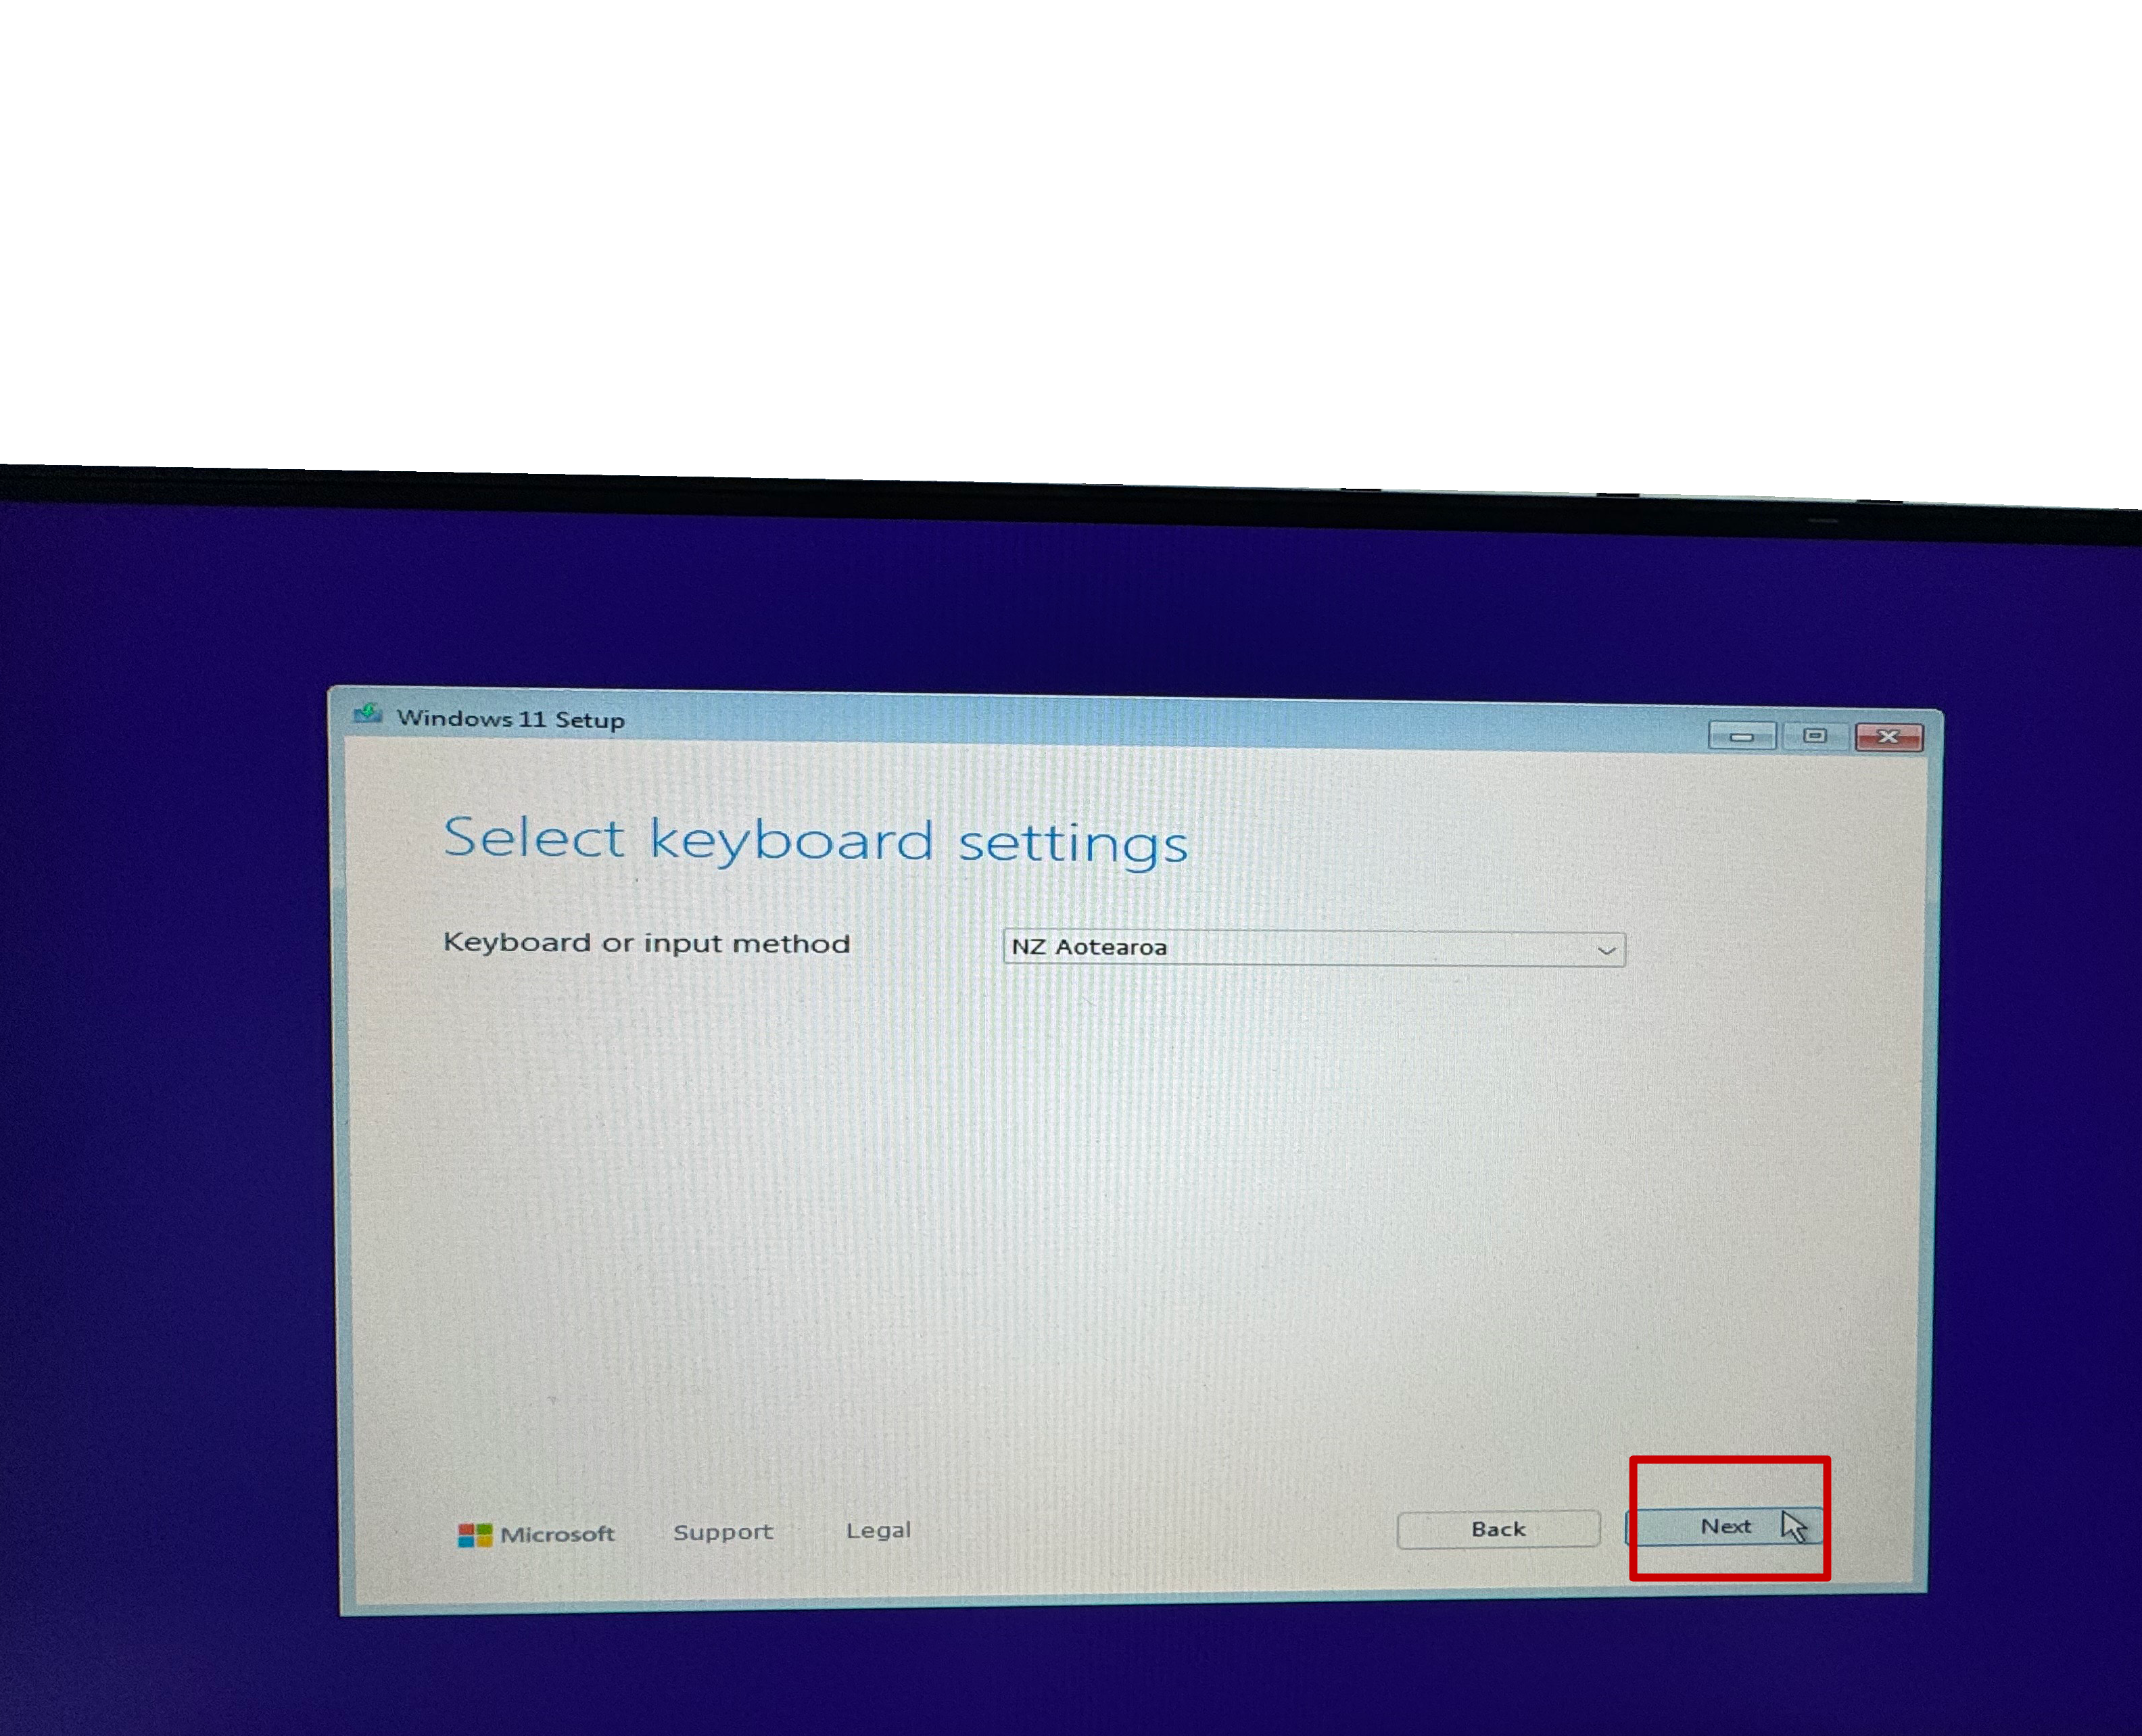
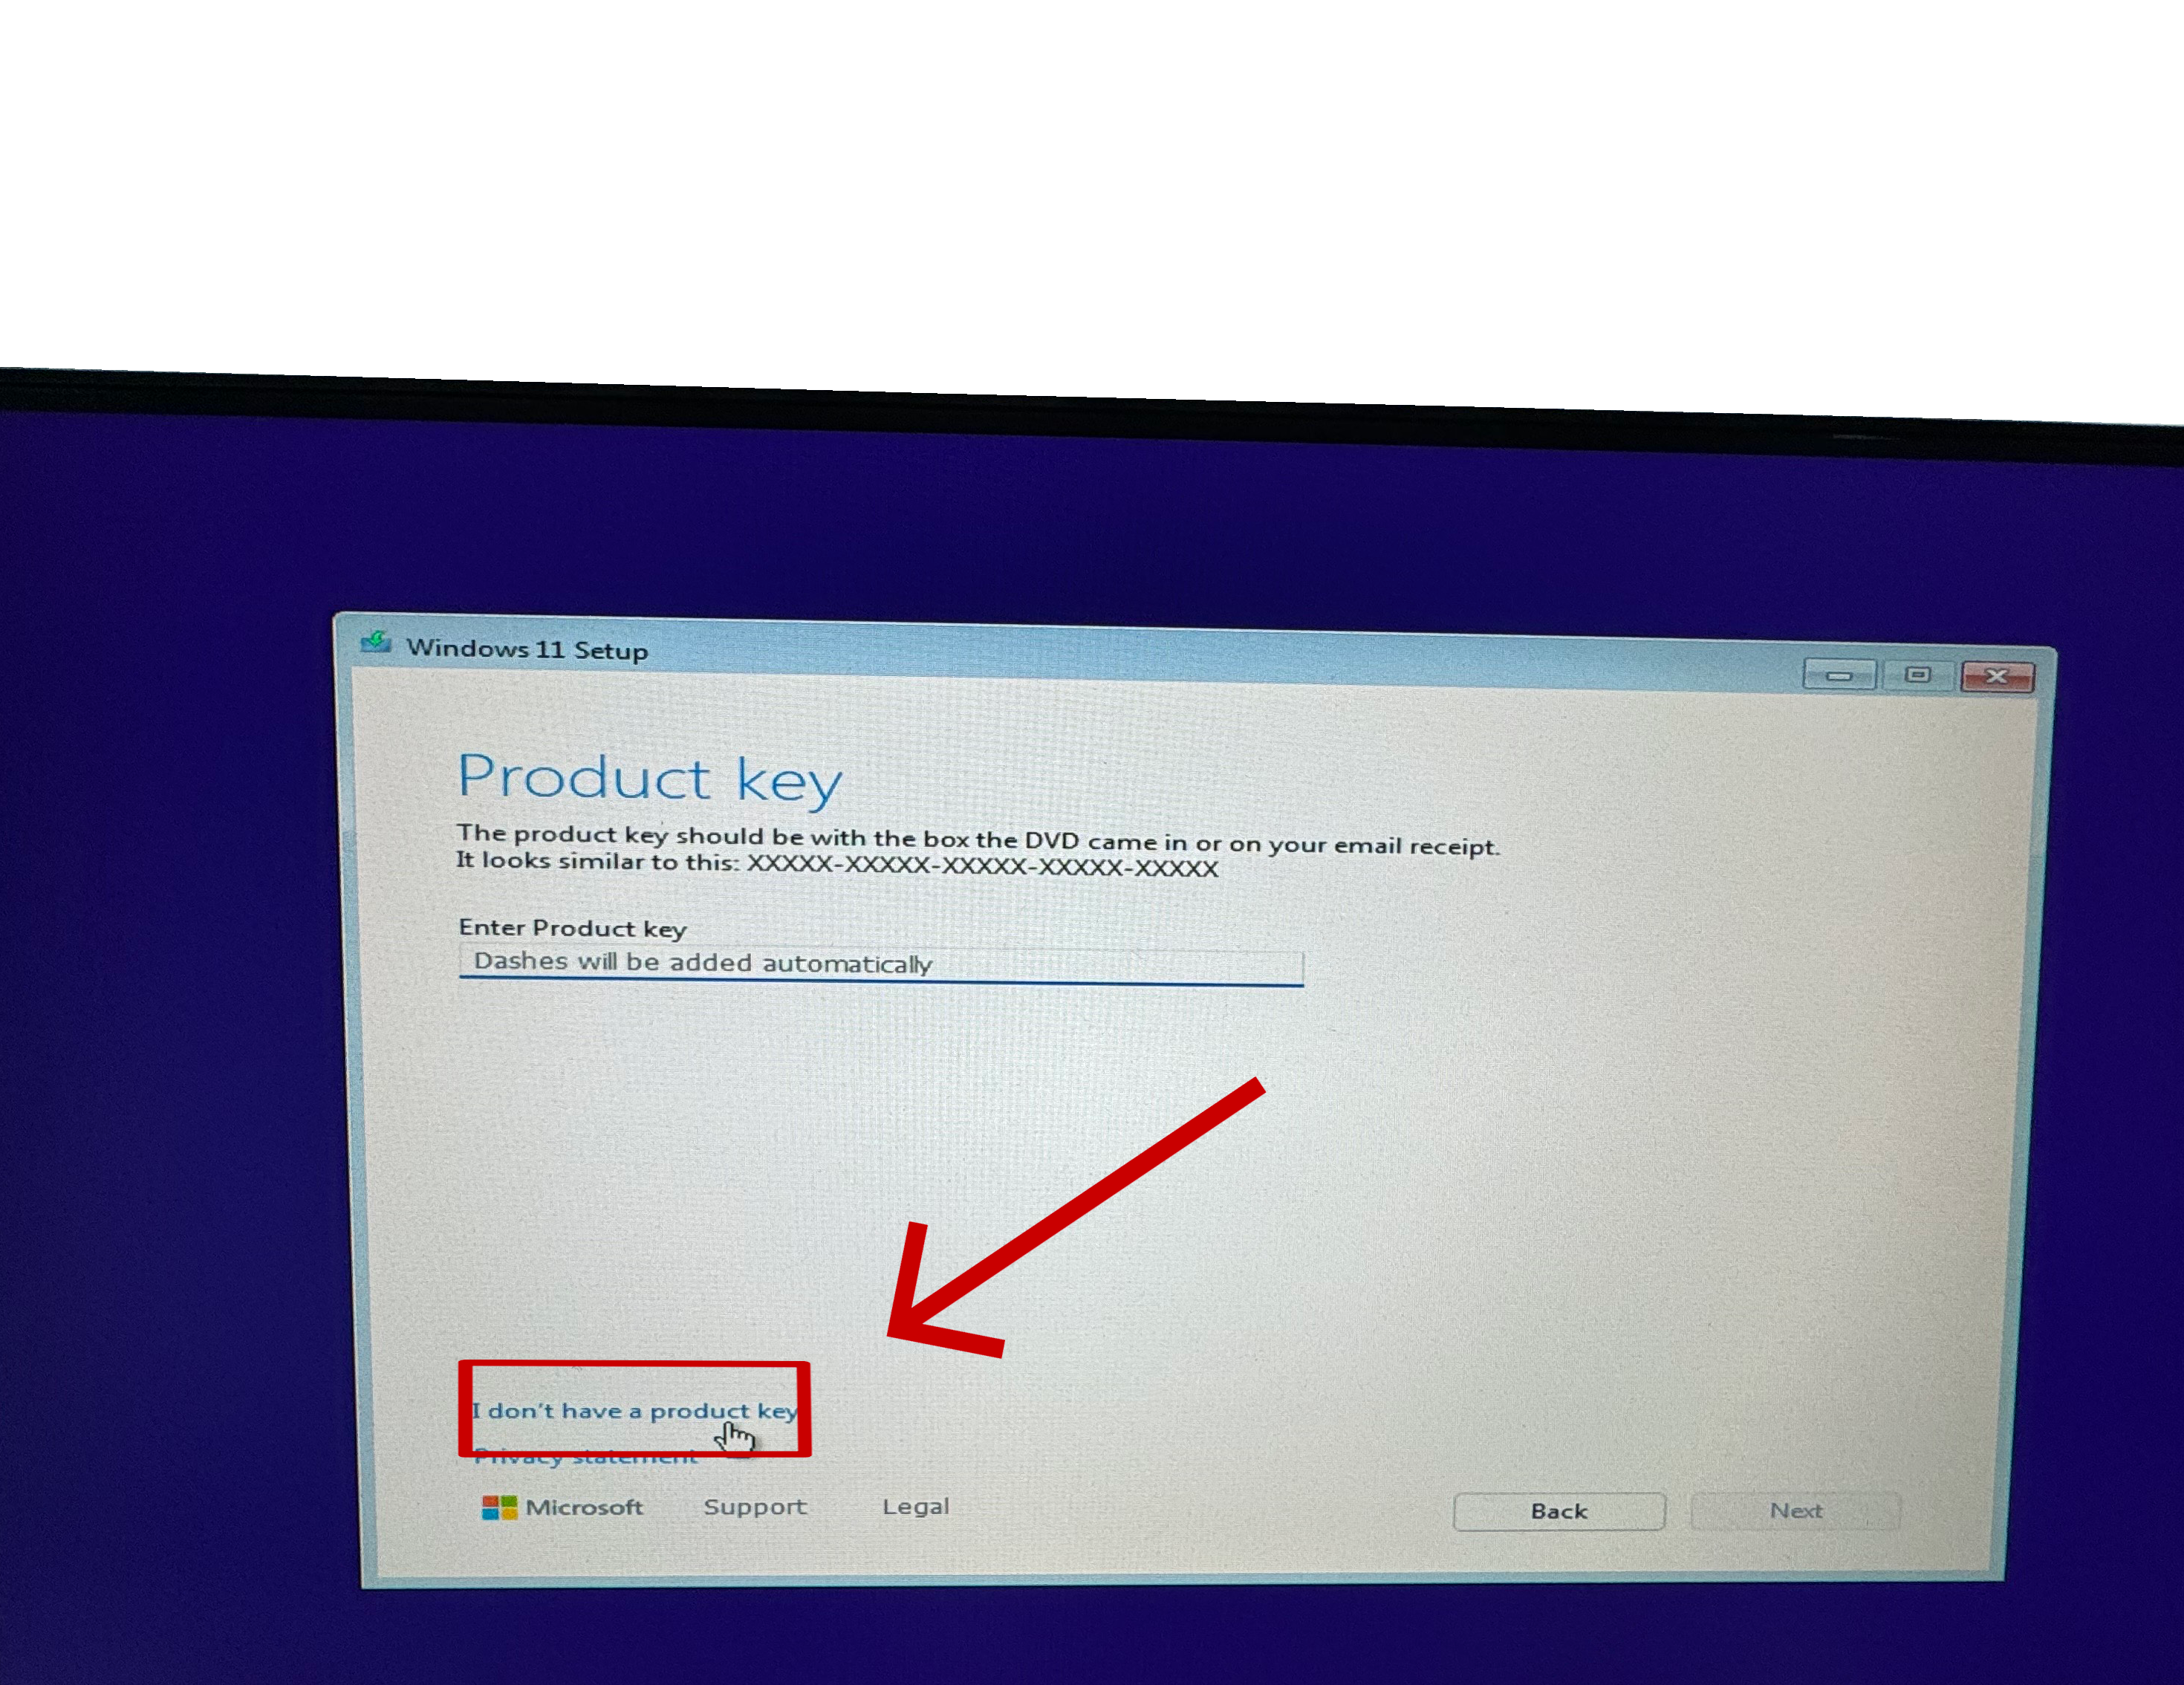
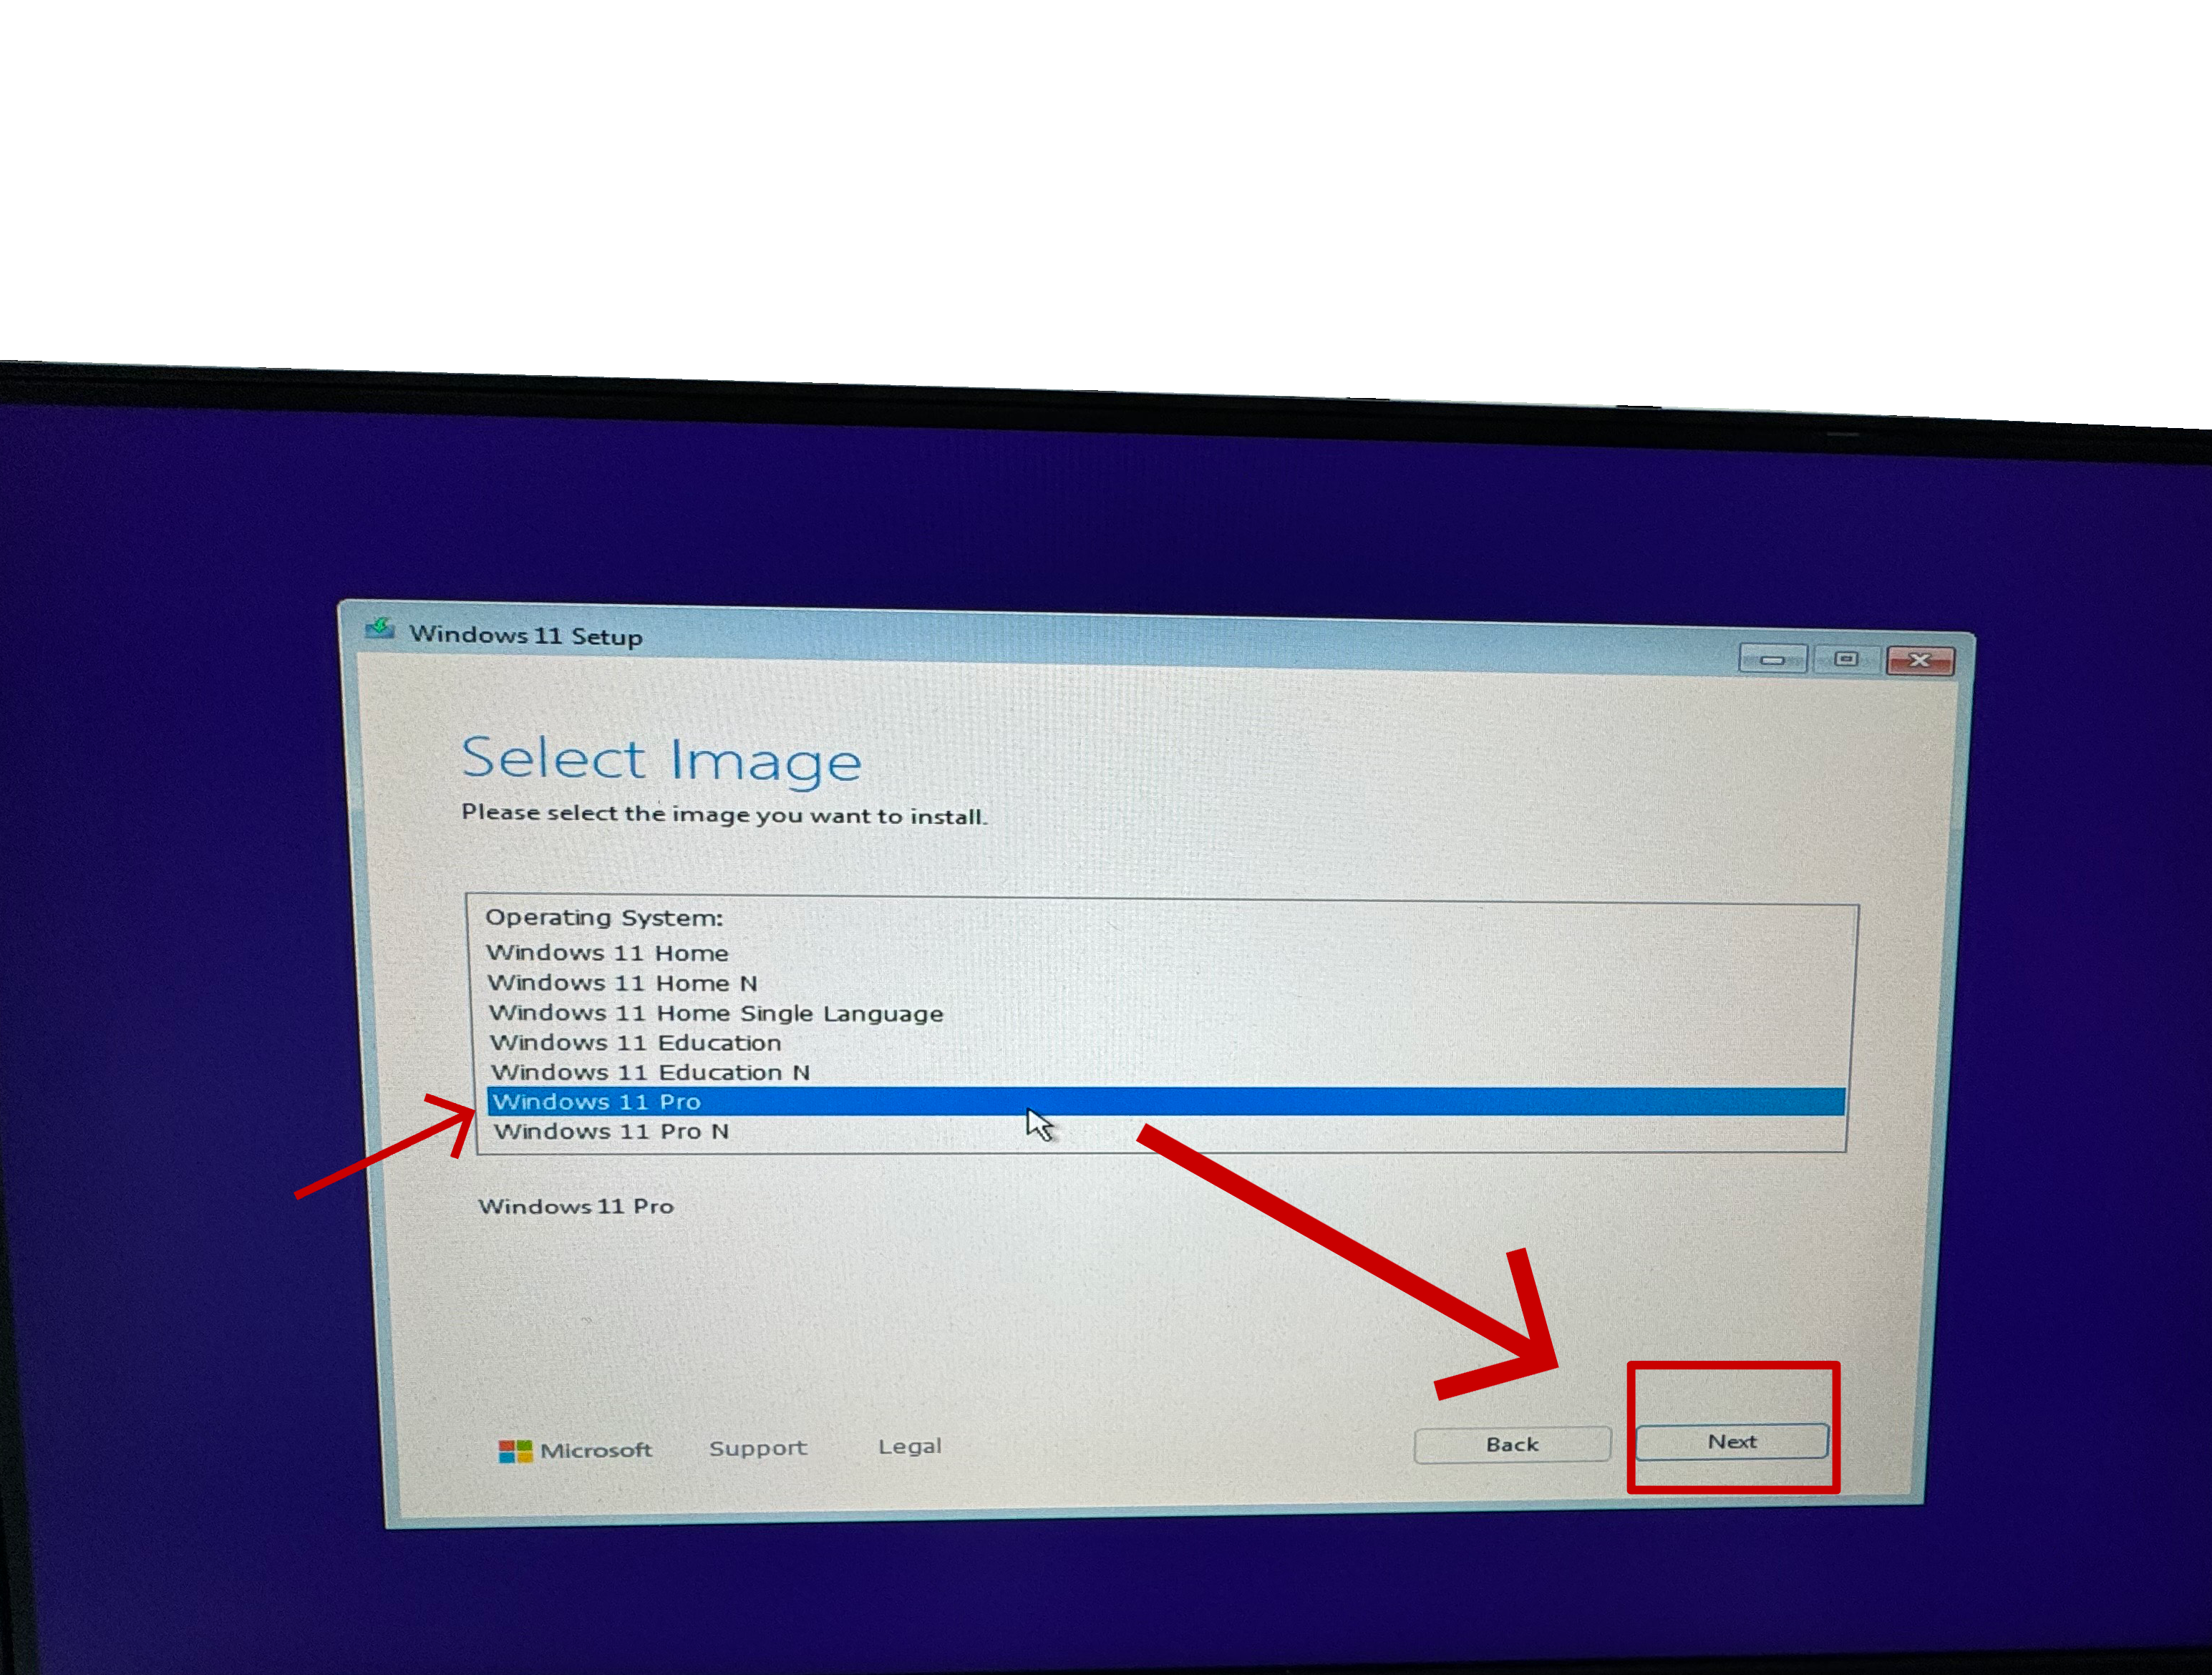
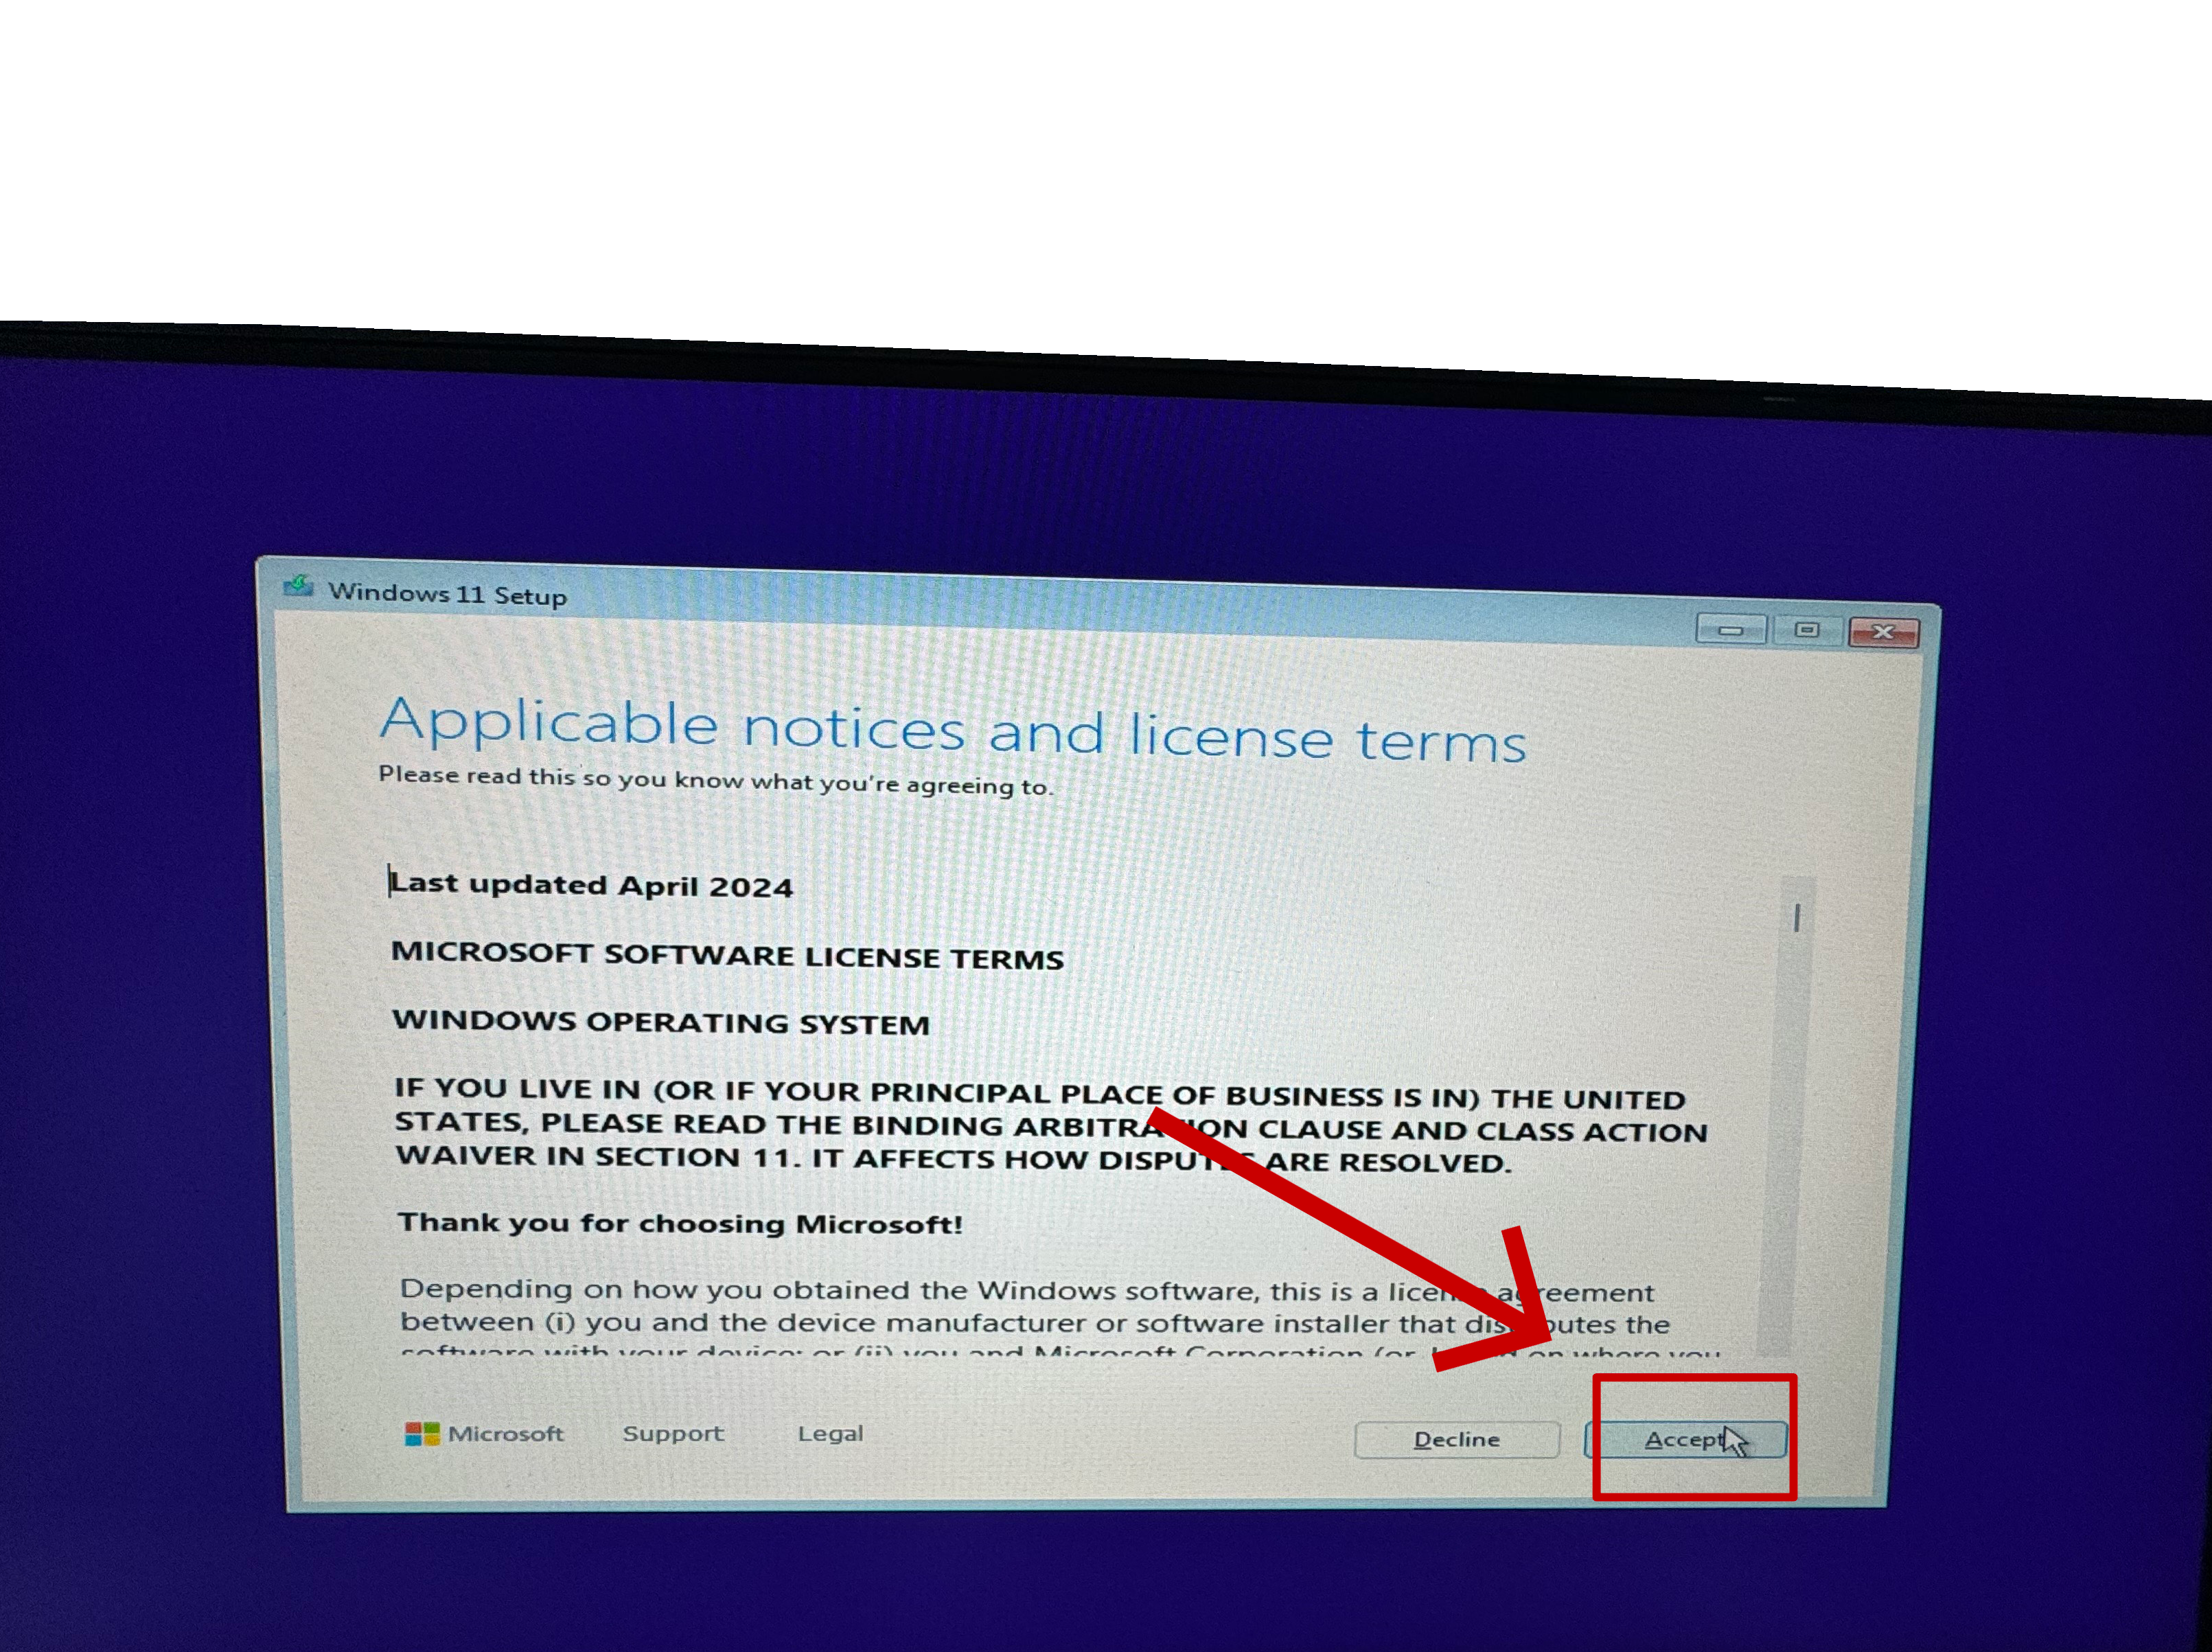
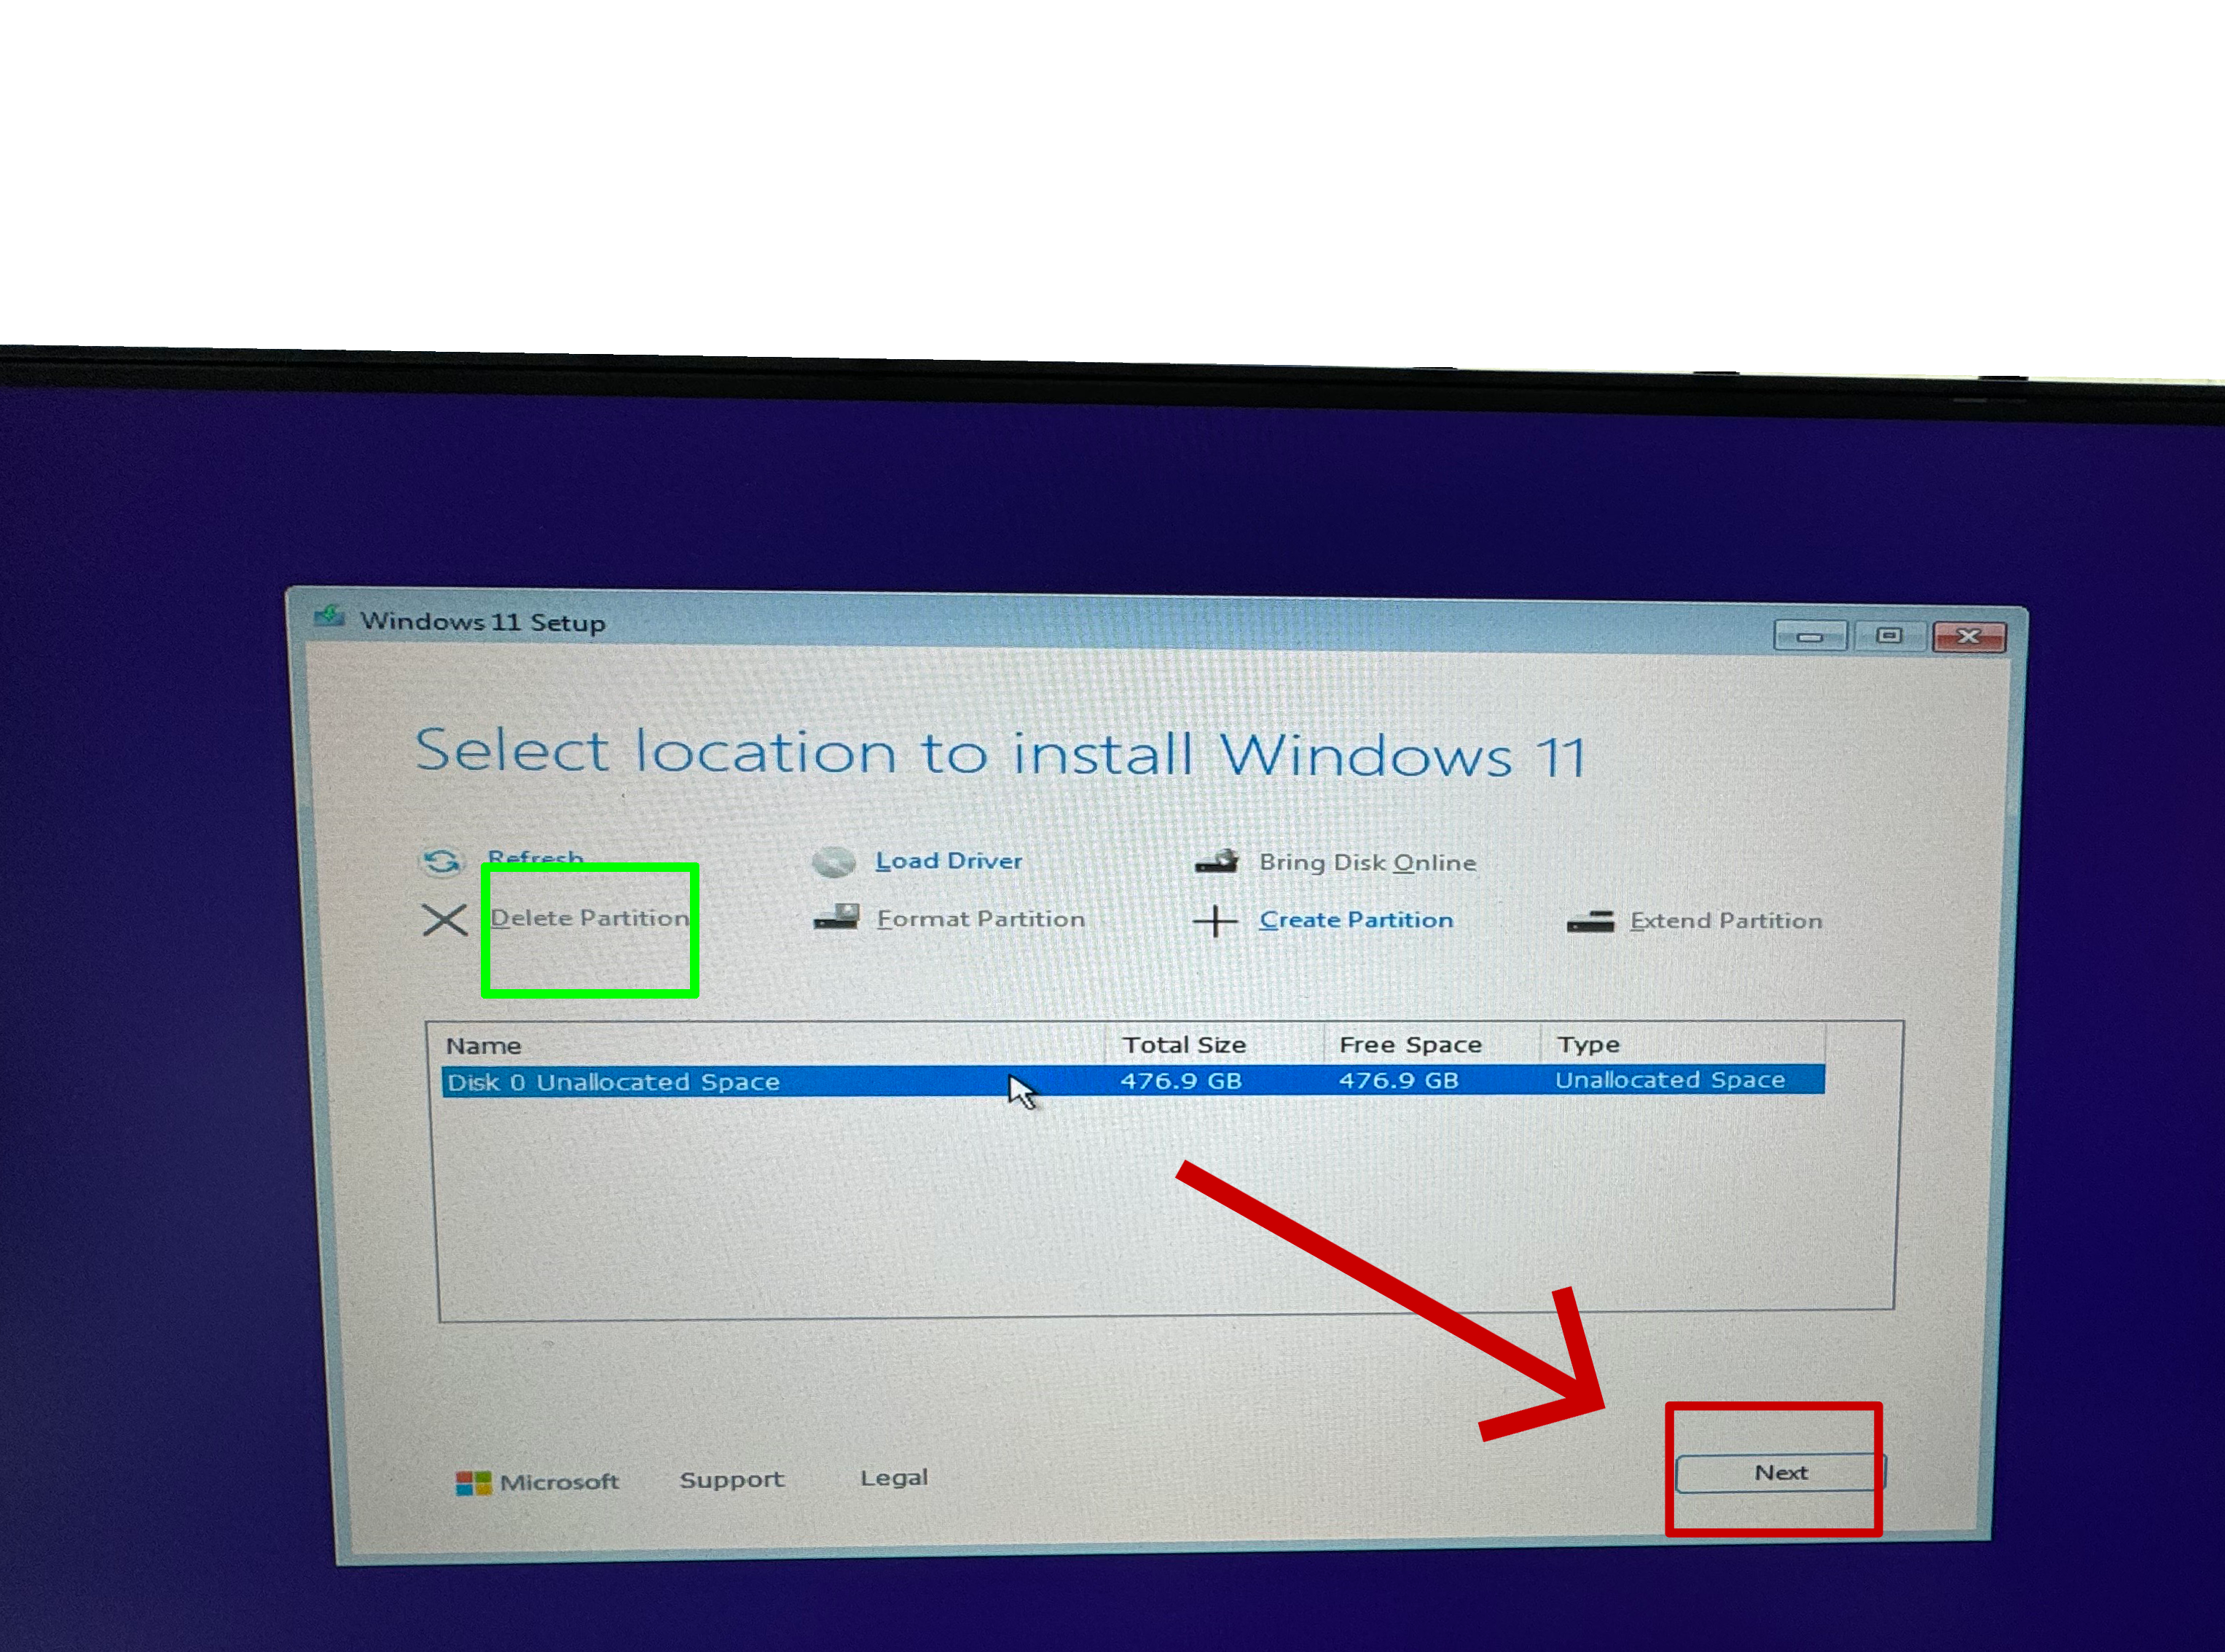
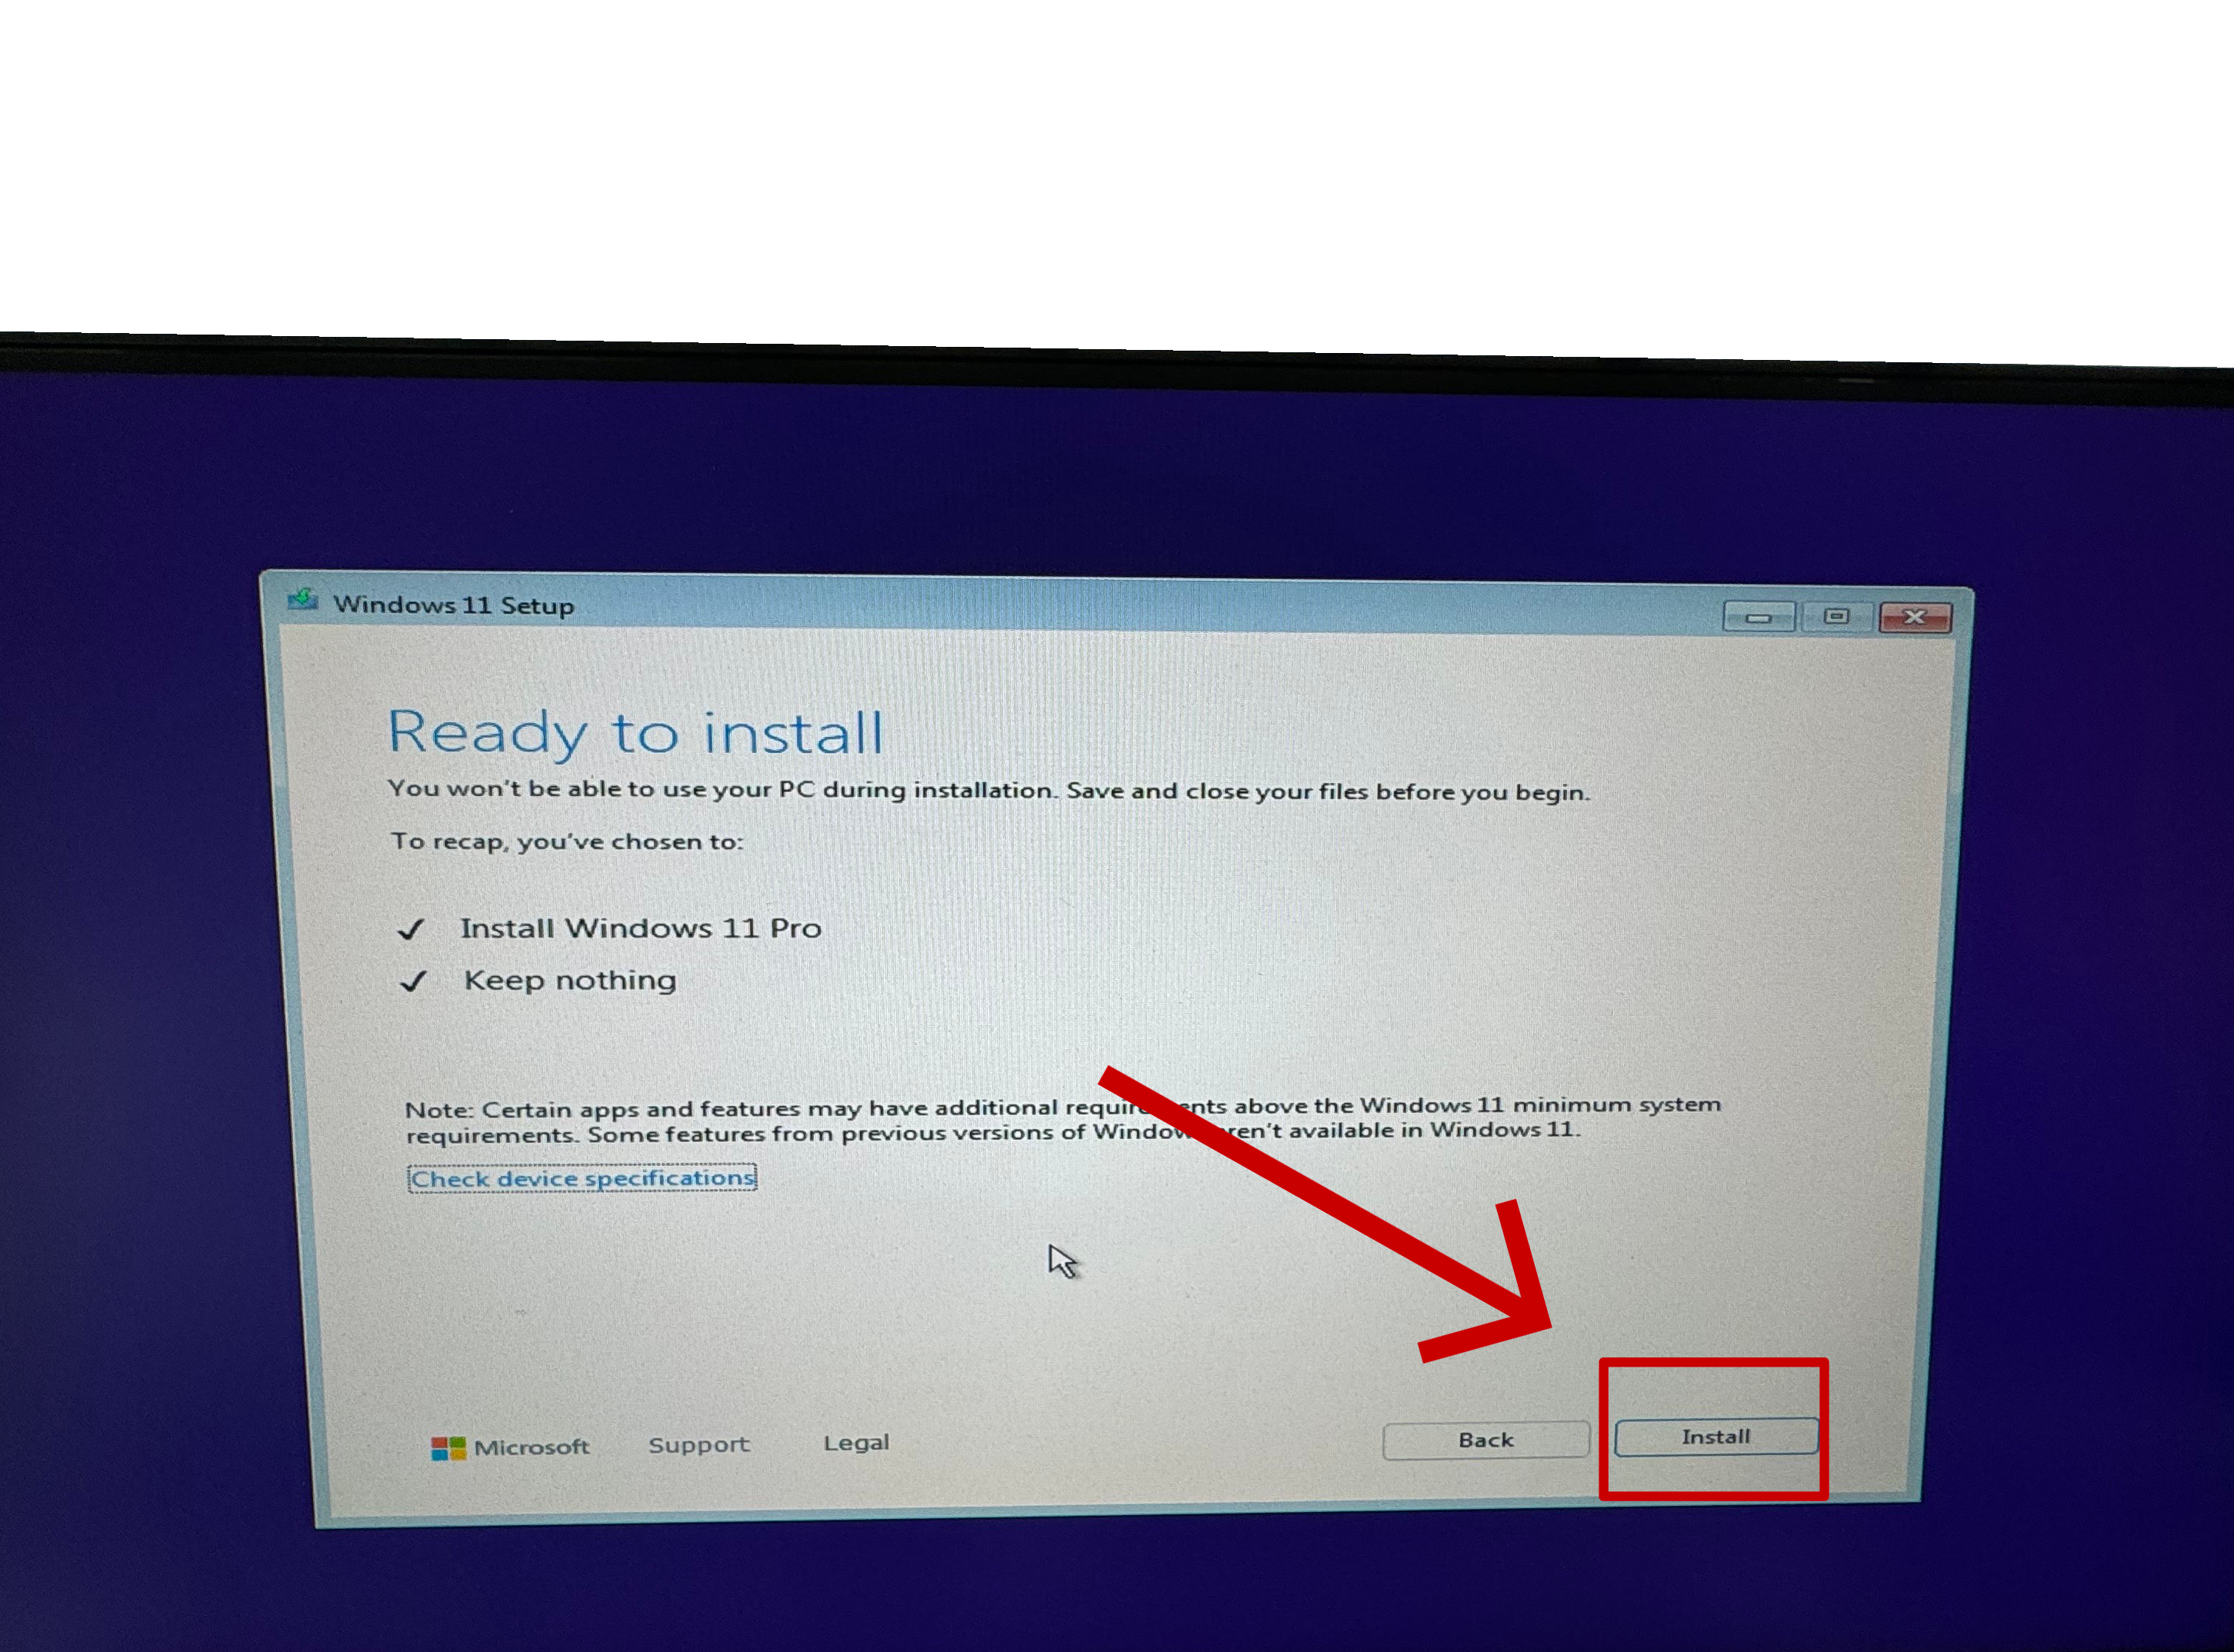
  • Reinstalling Windows 11 from scratch with a clean and clear installation process

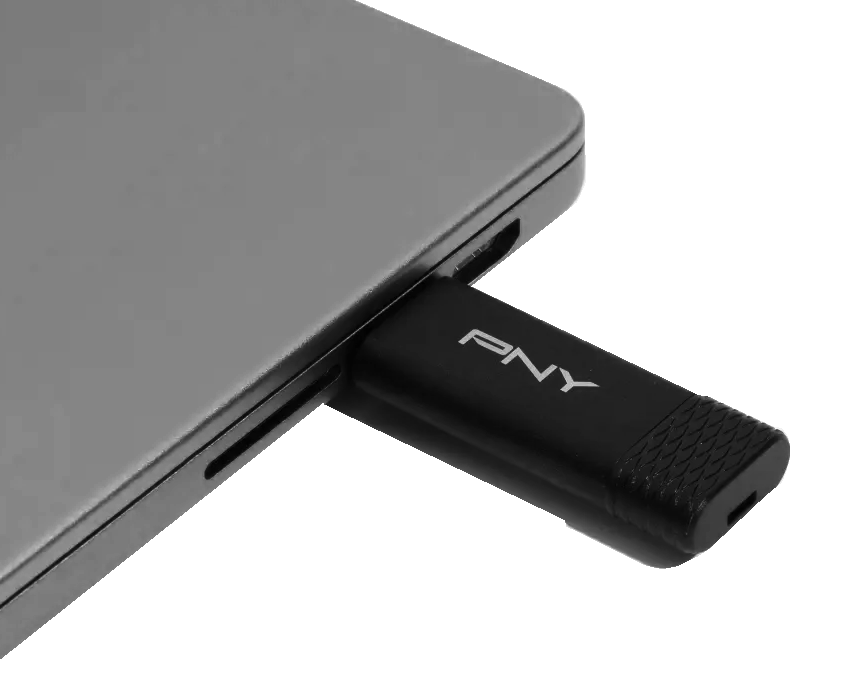
No advanced knowledge required - just an empty USB drive, an internet connection, and a bit of time. Follow along and you’ll have your system back up and running in no time.

Important Note; backup your data before attempting this as this process will DELETE ALL DATA on your operating system drive!

Section 1 - Installer Preparation

Step 1

Downloading the tool

First navigate to the Microsoft Windows 11 Download Page and select "Download Now" for the create Windows 11 Installation Media option.

Step 2

Getting the USB ready

Plug in a empty 16GB or larger USB drive into the computer. You can also use another Windows based laptop or computer for this step if your target system is not accessible/working.

Step 3

Accepting Terms & Conditions

Run the MediaCreationTool, and agree to the terms and conditions.

Step 4

Selecting language & edition

Next, make sure the edition shows the correct version, if not, you can untick the "use recommended options" and then select the edition you would like. Then click next.

Step 5

Selecting installation media type

Now choose the USB Flash Drive as the media to use, as we are going to be making your USB a bootable Windows installer tool.

Step 6

Selecting your USB Drive

Now make sure the only external drive that is connected to your computer is the empty USB drive that we are making the bootable USB with. Select the drive and click next.

Step 7

Wait for download to complete

Now the tool will download and install the bootable Windows 11 installation media to your USB drive. Wait for this step to complete and click next. (approx 15 minutes)

Step 8

Preparation completed

Once it has completed, you can click finish and the drive will complete the setup and will be ready to do the clean installation. If the USB is plugged into the computer that you want to do the fresh install, leave it plugged in. Otherwise you can now remove the USB from the computer you set it up using, and then plug it into the target computer.

Section 2 - Configuring The Reinstallation

Booting off your USB drive

The way to access the pre-OS boot menu will depend on your motherboard model. Please refer to any of the logos you see when first turning the computer on, or check your original order invoice for the motherboard brand/model.

MSI or ASROCK Motherboard

Immediately after pressing the power button to turn on your computer, start spamming the F11 key on your keyboard to access the boot menu shortcut. Once in the boot menu, select the UEFI USB Drive option).

Gigabyte MotherBoard

Immediately after pressing the power button to turn on your computer, start spamming the F12 key on your keyboard to access the boot menu shortcut. Once in the boot menu, select the UEFI USB Drive option).

ASUS MotherBoard

Immediately after pressing the power button to turn on your computer, start spamming the DEL key on your keyboard to access the BIOS. Once in the BIOS menu adjust the quick boot menu order to have the UEFI USB Drive selected as the first option. Then save and exit the bios.

Step 1

Selecting the language

Select your preferred language and time format settings then click next.

Step 2

Keyboard typing method

Select your preferred keyboard layout input and then click next.

Step 3

Selecting setup option

Select "Install Windows 11" and agree to the data deletion warning, then click next.

Step 4

Product activation setup

At this step click the "I don't have a product key" and it will continue the setup process.

Step 5

Choosing the correct edition

Choose your Windows edition - we use Windows 11 Professional as default. Then click next.

Step 6

Notices and terms

Read through the terms and notices then proceed.

Step 7

Clearing the OS drive partitions

Pay close attention to this step. The target is to delete all the partitions on your operating system Windows SSD drive to prepare it for the clean installation.

If you have a single storage drive in the computer you can go ahead with deleting every partition until it shows as a completely unallocated space (as per the image).

If your system features multiple storage drives, identify which disk is your primary operating system drive, and then ONLY delete the partitions for that disk label. (eg: DISK 0 Partition 1, Disk 0 Partition 2, etc).

Then click next after selecting the unallocated empty disk.

Step 8

Start the installation

Proceed to click the install button and the process will begin, estimated duration 15 to 45 minutes.

Section 3 - Installing Required Drivers

Motherboard Software

Install your motherboard's software to control features like the RGB lighting and update your drivers from within the support sections of these utilities.

Graphics Drivers

You will need to now download the required graphics drivers and Windows updates. Once the NVIDIA app is installed, navigate to the driver section of the app to install the latest driver. The AMD Autodetect will find the correct driver and install it for you after running it. The INTEL ARC Driver will install the ARC universal driver.

Windows Updates & Health Scan

Disk Health Clean - Type CMD into the search bar, right click and run as administrator. Then input the following commands, press enter after inputting them:

  1. chkdsk /f - press y to confirm
  2. chkdsk /r - press y to confirm
  3. DISM.exe /Online /Cleanup-image /Restorehealth
  4. While this CMD window is still open, now open another CMD as administrator, and run this final command: sfc /scannow

Check for Windows updates - Search Windows Update in the search bar. Install and then reboot the system once the updates have completed and both CMD windows have completed 100% of their scans. Then it will do a disk check on the next reboot, and once that is done the Windows reinstall process has now been completed.

Installation Guide Complete

If you've purchased a computer from us and run into any issues following this guide - or if you’d like assistance with the installation, click the button below to submit a support ticket, and our team will assist you.

Technical Support